Electromix Pro Contact Form Setup
In this article, you’ll learn how to set up and customize the Contact Form Section of the Electromix Pro theme, This guide will help you configure these settings to align with your site’s branding and functionality needs.
(1) How to manage the Contact Form ?
Before understanding how to manage the Contact Form Section, let’s first learn how to create and generate the shortcode for the Contact Form.
Creating Contact Form and Generating Shortcode
Before proceeding, ensure you’re logged into your WordPress Dashboard.
To create a contact form and generate a shortcode, follow these steps:
- From the WordPress Dashboard, navigate to Contact > Add New.
- On the Add New Contact Form page, you can add the title of the form, manage the form labels, etc.
- Click Save when you’re done.
- After saving the new form, a shortcode will be generated. Copy it, as it will be required in the Customizer when managing the contact form section.
Note: The shortcode for a new form will only be generated once you have saved the new form, so make sure to save the form first.
Reminder: You can’t create a form and generate a shortcode without installing and activating the Contact Form 7 plugin, so make sure to install and activate this plugin.
Tip: If you are unfamiliar with Contact Form 7 and its features, please go through this link to learn more about this plugin: Contact Form 7 Plugin.

Managing Contact Form Section
Before proceeding, ensure you’re logged into your WordPress Dashboard.
To manage the Contact Form section, follow these steps:
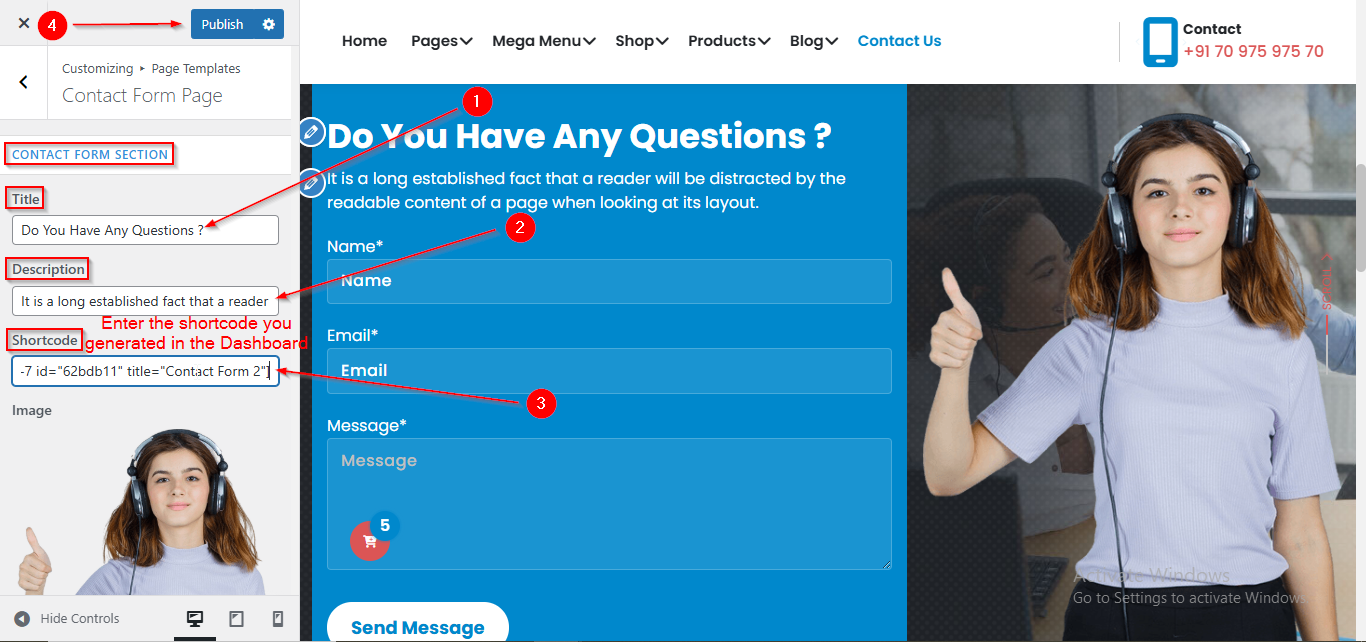
- From the WordPress Dashboard, navigate to Appearance > Customize.
- On the Customizer page, go to Page Templates > Contact Page.
- Scroll down until you see the CONTACT FORM SECTION. From here, you can manage the form title , description and add the shortcode that you generated in the Dashboard.
- Once the shortcode is added, the contact form will appear on your site.
- Click Publish when you’re done.
(2) How to manage the Image and Background Image in Contact Form Section ?
Before proceeding, ensure you’re logged into your WordPress Dashboard.
To manage the Image and Background Image in Contact Form Section, follow these steps:
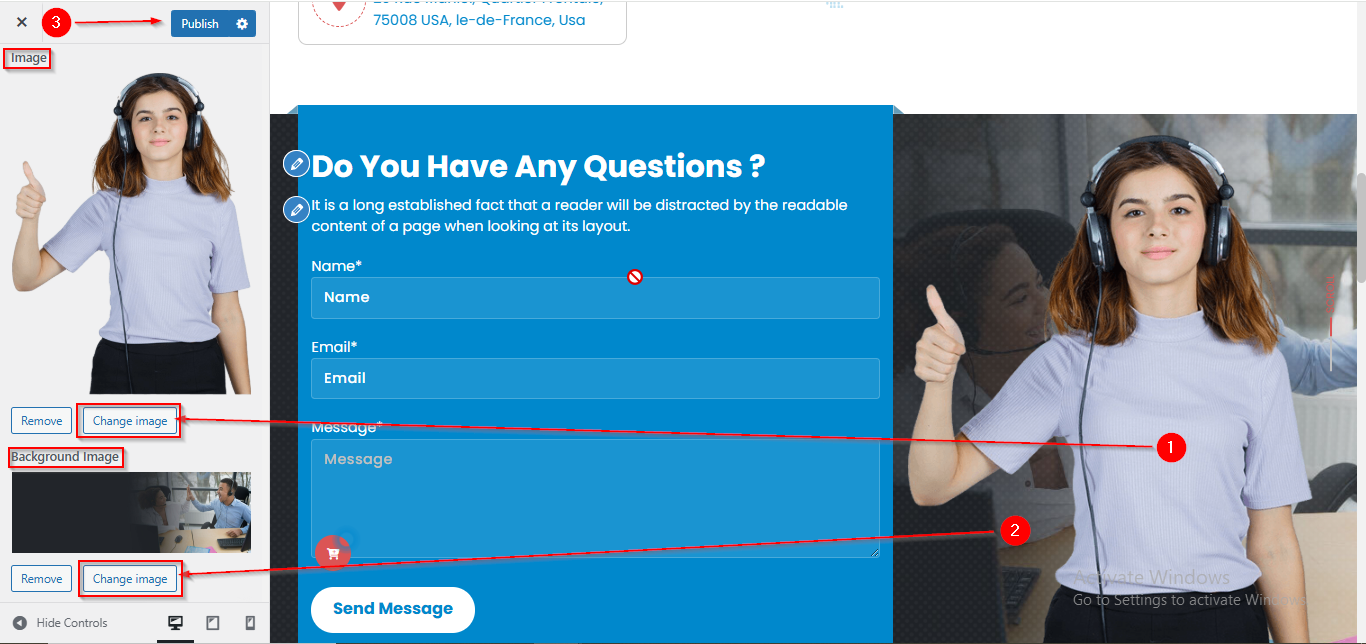
- From the WordPress Dashboard, navigate to Appearance > Customize.
- On the Customizer page, go to Frontpage Sections > Contact Form Section.
- Here, from the Image and Background Image option you can manage them.
- Click Publish when you’re done.