Electromix Pro Office Location Setup
In this article, you’ll learn how to set up and customize the Office Location Section of the Electromix Pro theme, This guide will help you configure these settings to align with your site’s branding and functionality needs.
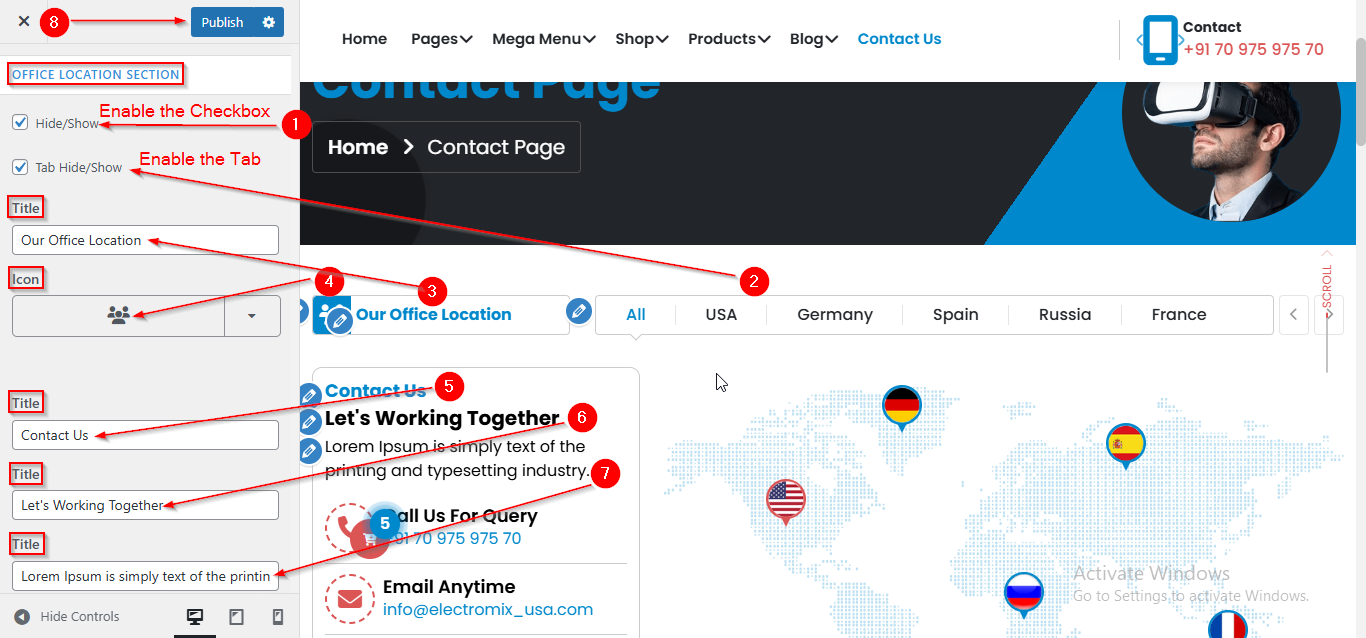
(1) How to manage the Filter Tab ,Tab Title Icon and Contact Info title in Office Location Section ?
Before proceeding, ensure you’re logged into your WordPress Dashboard.
To manage the Filter Tab , Tab Title , Icon and Contact Info title in Office Location Section, follow these steps:
- From the WordPress Dashboard, navigate to Appearance > Customize.
- On the Customizer page, go to Page Templates > Office Location Page.
- From here you can manage the Filter Tab , Tab Title , Icon and Contact Info title.
- Click Publish when you’re done.
Note : Ensure the checkbox labeled Hide/Show Section is checked if you want to Display the Section.
(2) How to manage the Content in Office Location Section ?
Before proceeding, ensure you’re logged into your WordPress Dashboard.
To manage the Content in Office Location Section, follow these steps:
- From the WordPress Dashboard, navigate to Appearance > Customize.
- On the Customizer page, go to Page Templates > Office Location Page.
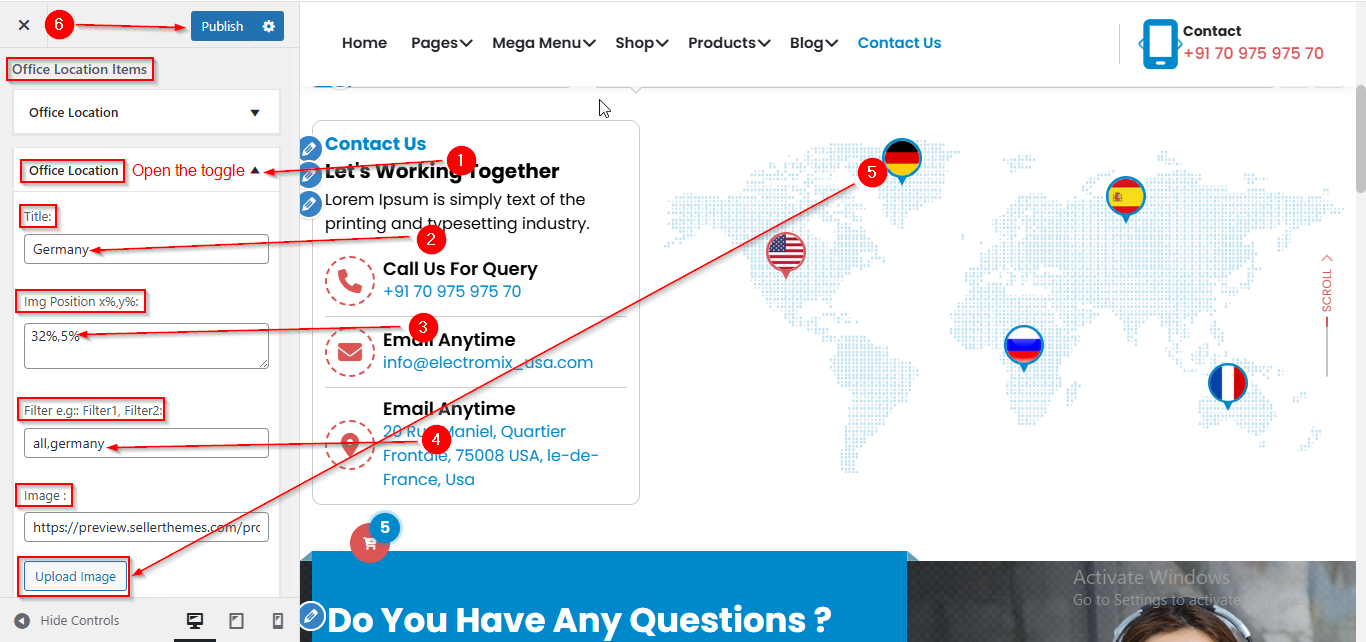
- Scroll down until you see the Office Location Items.
Managing Title , Image Position , Filter and Image
4. Form here you can manage Office Location content such as Title , Image Position , Filter and Image.
Managing Contact Info Content
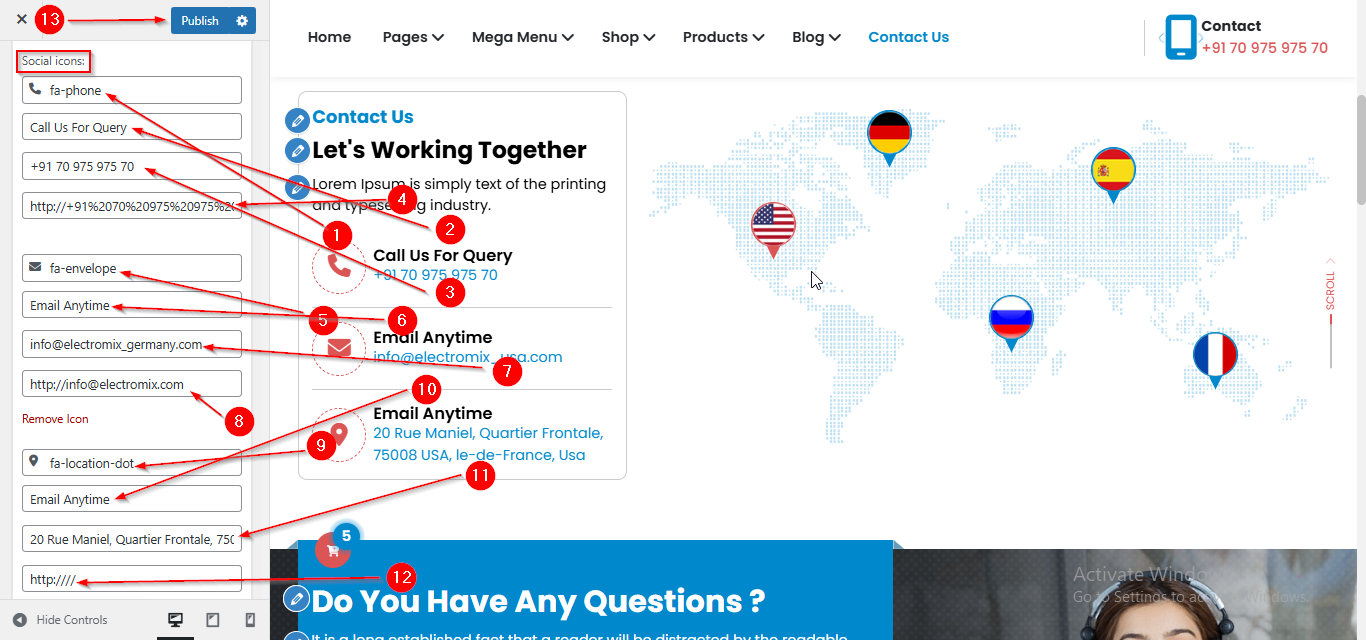
5. Scroll down a bit until Social Icons and here you can manage Contact info content such as Icon , Text and Phone number.