Electromix Pro Testimonial Setup
In this article, you’ll learn how to set up and customize the Testimonial Section of the Electromix Pro theme, This guide will help you configure these settings to align with your site’s branding and functionality needs.
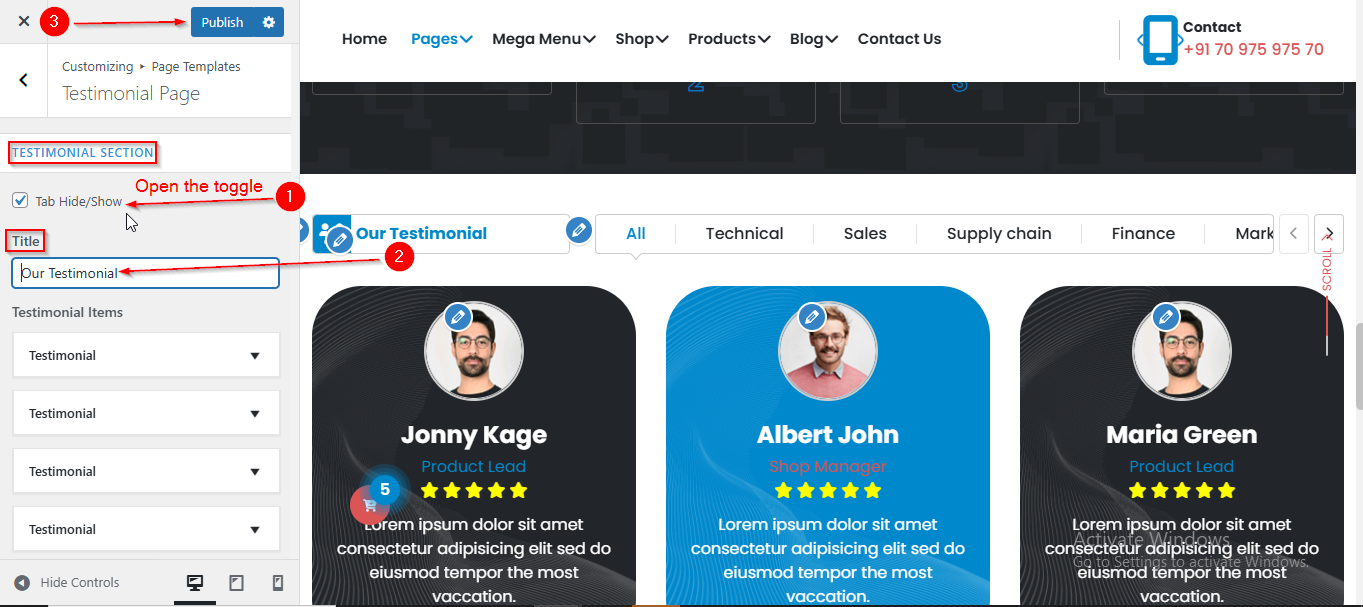
(1) How to manage the Filter Tab and Title in Testimonial Section ?
Before proceeding, ensure you're logged into your WordPress Dashboard.
To manage the Filter Tab and Title in Testimonial Section, follow these steps:
- From the WordPress Dashboard, navigate to Appearance > Customize.
- On the Customizer page, go to Page Templates > Testimonial Page.
- Enable the Tab Hide/Show checkbox to display the Tab.
- Enter the Title in the Title Feild.
- Click Publish when you're done.
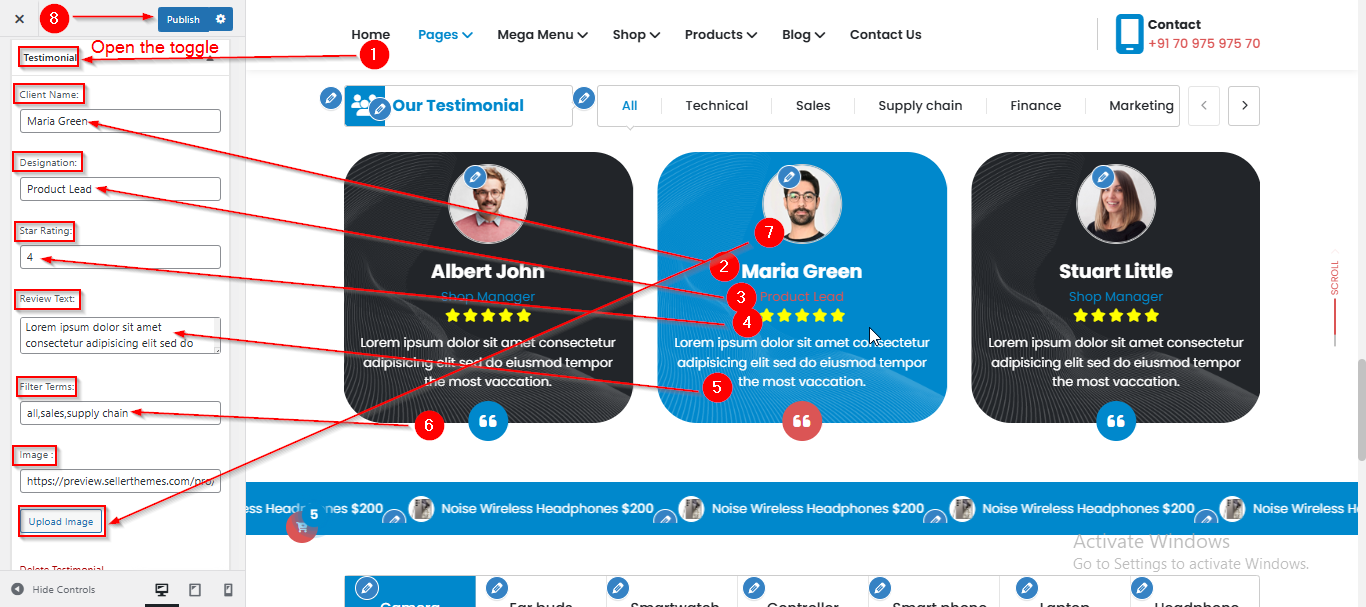
(2) How to manage the Testimonial Content in Testimonial Section ?
Before proceeding, ensure you’re logged into your WordPress Dashboard.
To manage the Testimonial Content in Testimonial Section, follow these steps:
- From the WordPress Dashboard, navigate to Appearance > Customize.
- On the Customizer page, go to Frontpage Sections > Testimonial Section.
- Here, Open the Testimonial Toggle to manage the Testimonial Content such as Client Name , Designation , Star Rating , Review Text , Filter Terms and Image.
- Click Publish when you’re done.
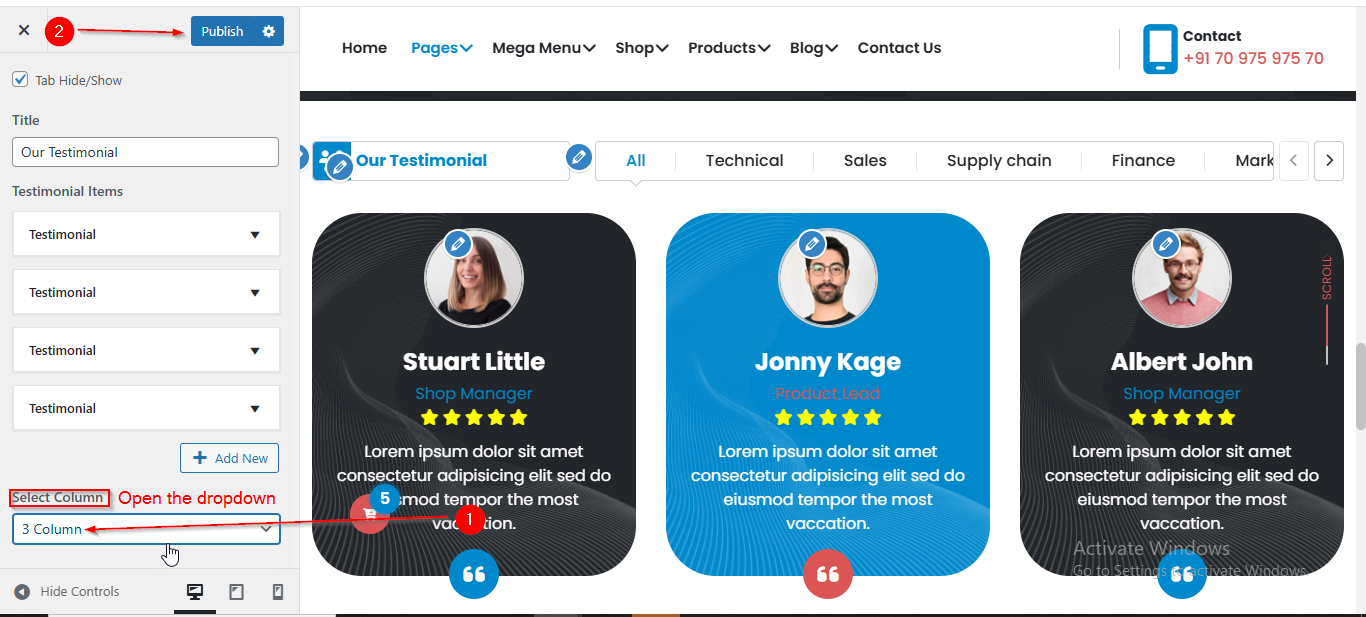
(3) How to manage the Column in Testimonial Section ?
Before proceeding, ensure you're logged into your WordPress Dashboard.
To manage the Column in Testimonial Section, follow these steps:
- From the WordPress Dashboard, navigate to Appearance > Customize.
- On the Customizer page, go to Frontpage Sections > Testimonial Section.
- Here, Open the Select Column Dropdown to manage the Column.
- Click Publish when you're done.