
Mega Mart Lite Footer Setup
In this article, you’ll learn how to set up and customize the Footer of the Mega Mart Lite theme, This guide will help you configure these settings to align with your site’s branding and functionality needs.
(1) How to manage Footer Widgets in the Dashboard ?
Before setting up the Footer in the Customizer, it's important to know how to manage footer widgets directly from the Dashboard.
To manage the Footer Widgets in the Dashboard, follow these steps:
- Ensure you're logged into your WordPress Dashboard.
- From the WordPress Dashboard, navigate to Appearance > Widgets.
- In the Widgets Page, you can drag and drop various widgets from the Available Widgets to the Footer1 , Footer2 , Footer3 , Footer4 & Footer5 widget areas.
- Once you've made the necessary changes, click Save to apply them.
Tip: We recommend using the Classic Widgets plugin for a simpler and more familiar way to manage widgets. You can download it here: Classic Widgets Plugin.
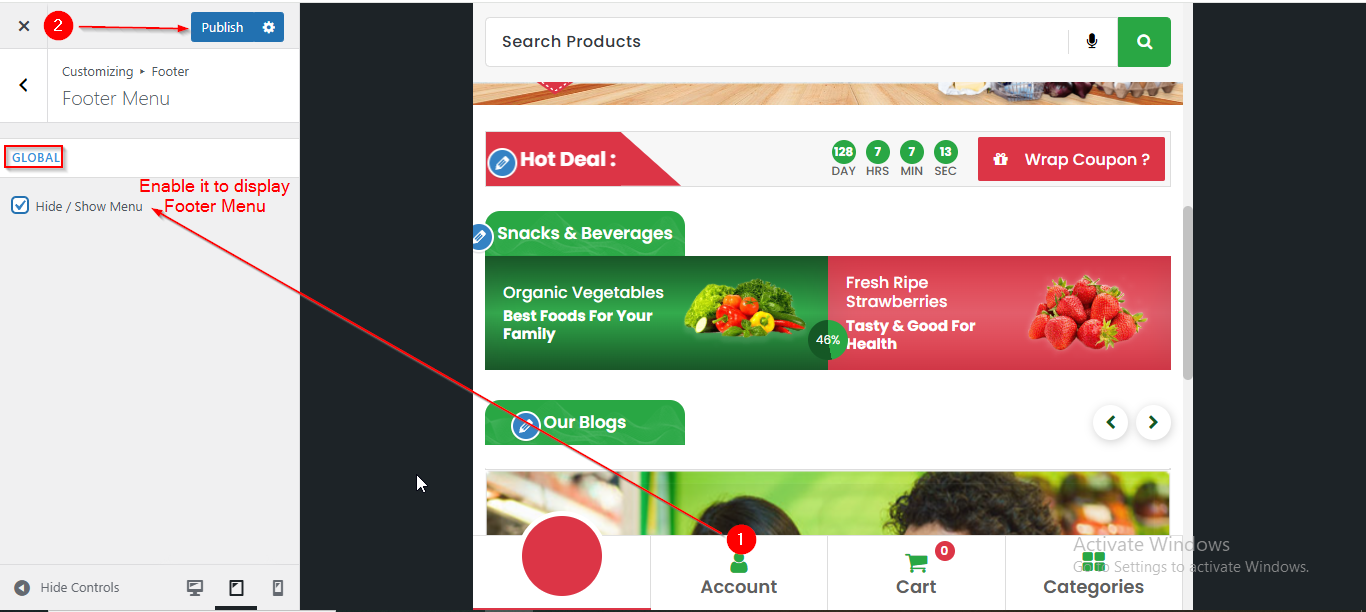
(2) How to manage the Footer Menu in Footer Section ?
Before proceeding, ensure you're logged into your WordPress Dashboard.
To manage the Footer Menu in Footer Section, follow these steps:
- From the WordPress Dashboard, navigate to Appearance > Customize.
- On the Customizer page, go to Footer > Footer Menu.
- Here, you have to enable the checkbox Hide/Show Menu from the GLOBAL Option to display the Footer Menu.
- Click Publish when you're done.
Note: This Menu setting will only apply to devices with a screen width smaller than 992px. On devices with a width of 992px or greater, the menu title will not be displayed.
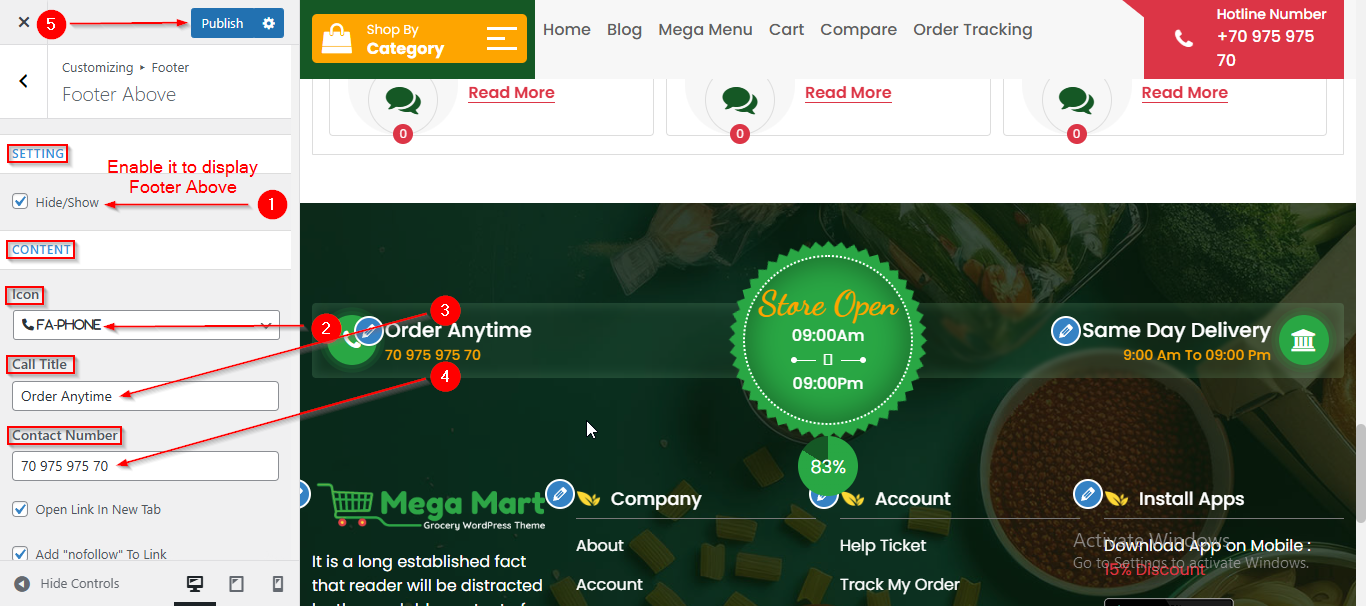
(3) How to manage the Footer Contact 1 in Footer Section ?
Before proceeding, ensure you're logged into your WordPress Dashboard.
To manage the Footer Contact 1 in Footer Section , follow these steps:
- From the WordPress Dashboard, navigate to Appearance > Customize.
- On the Customizer page, go to Footer > Footer Above.
- From the CONTENT section you can manage the Footer Contact 1 Content such as Icon , Call Title and Contact Number.
- Click Publish when you're done.
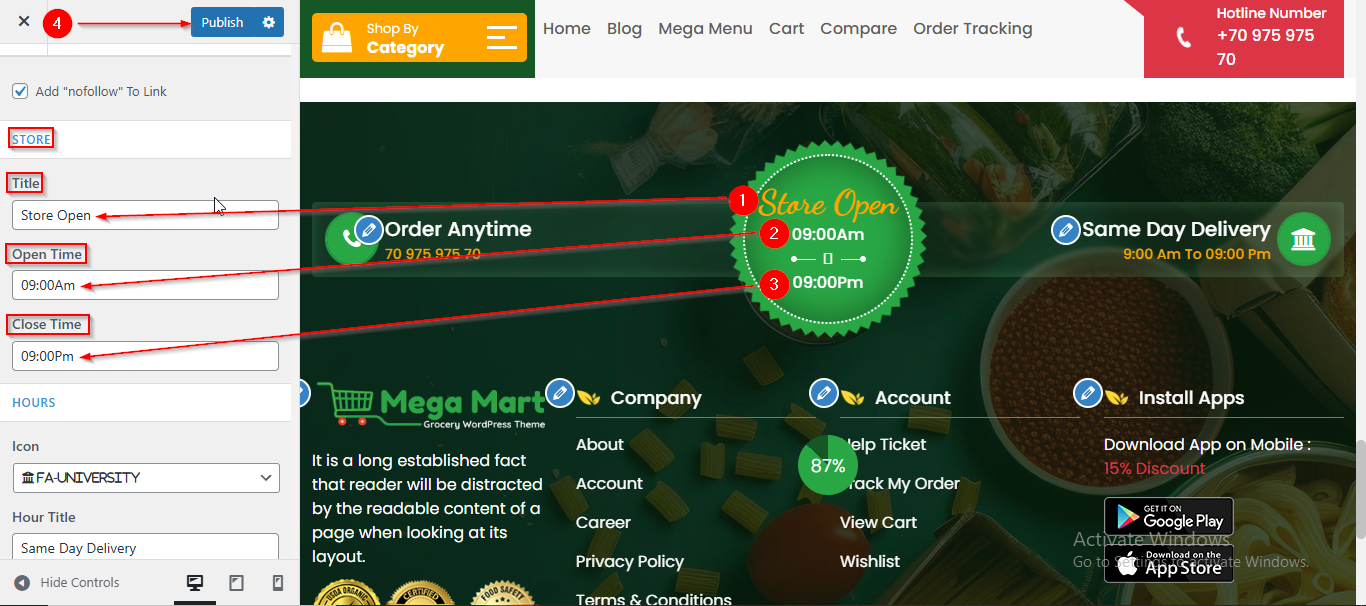
(4) How to manage the Store Content in Footer Section ?
Before proceeding, ensure you're logged into your WordPress Dashboard.
To manage the Store Contact in Footer Section , follow these steps:
- From the WordPress Dashboard, navigate to Appearance > Customize.
- On the Customizer page, go to Footer > Footer Above.
- Scroll down until you see the STORE Section.
- From here you can manage the Store content such as Title , Open Time and Close Time.
- Click Publish when you're done.
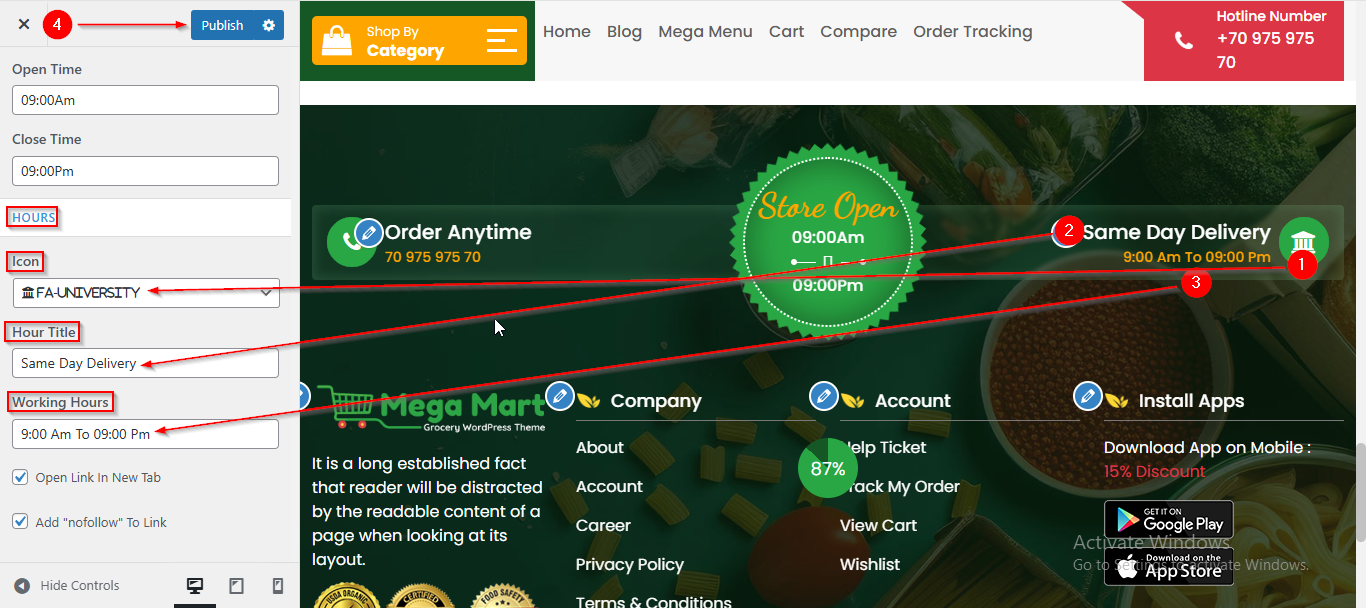
(5) How to manage the Footer Contact 2 in Footer Section ?
Before proceeding, ensure you're logged into your WordPress Dashboard.
To manage the Footer Contact 2 in Footer Section , follow these steps:
- From the WordPress Dashboard, navigate to Appearance > Customize.
- On the Customizer page, go to Footer > Footer Above.
- Scroll down until you see the HOURS Section.
- From the HOURS section you can manage the Footer Contact 2 Content such as Icon , Hour , Working hours.
- Click Publish when you're done.
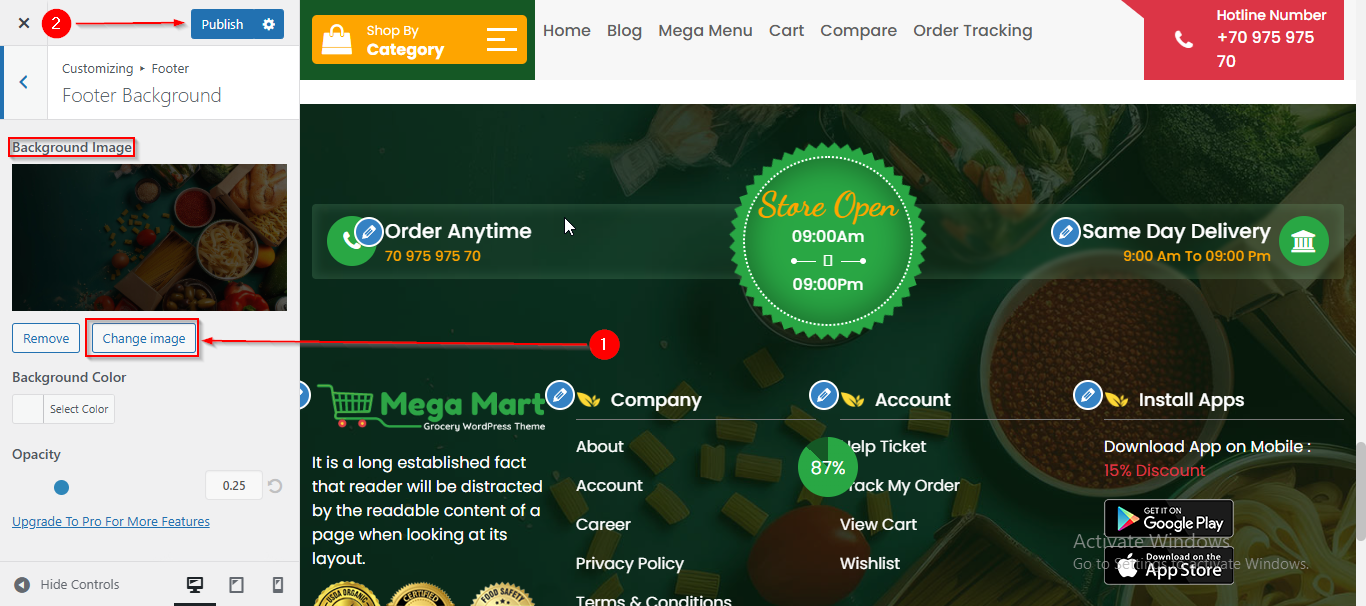
(6) How to manage the Footer Background in Footer Section ?
Before proceeding, ensure you're logged into your WordPress Dashboard.
To manage the Footer Background in Footer Section, follow these steps:
- From the WordPress Dashboard, navigate to Appearance > Customize.
- On the Customizer page, go to Footer > Footer Background.
- Here , you can set the Background Image.
- Click Publish when you're done.
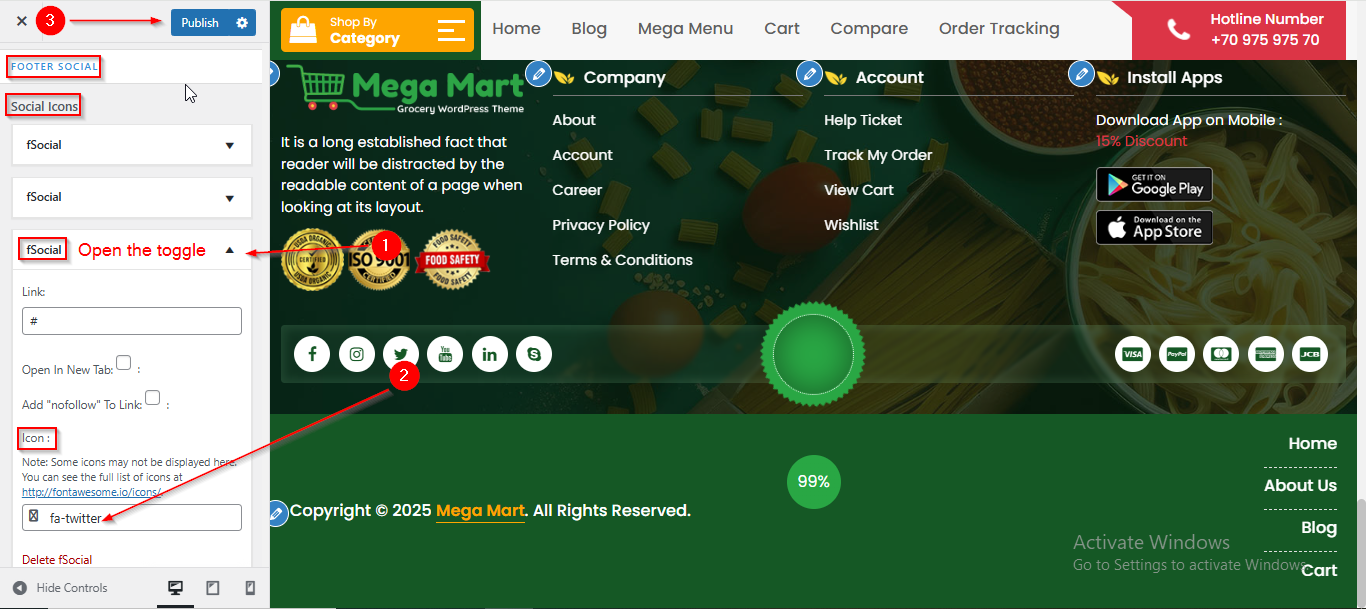
(7) How to manage the Social Icons in Footer Section ?
Before proceeding, ensure you're logged into your WordPress Dashboard.
To manage the Social Icons in Footer Section, follow these steps:
- From the WordPress Dashboard, navigate to Appearance > Customize.
- On the Customizer page, go to Footer > Below Footer.
- Look for FOOTER SOCIAL section.
- Open the fSocial toggle to manage the Social Icons.
- Click Publish when you're done.
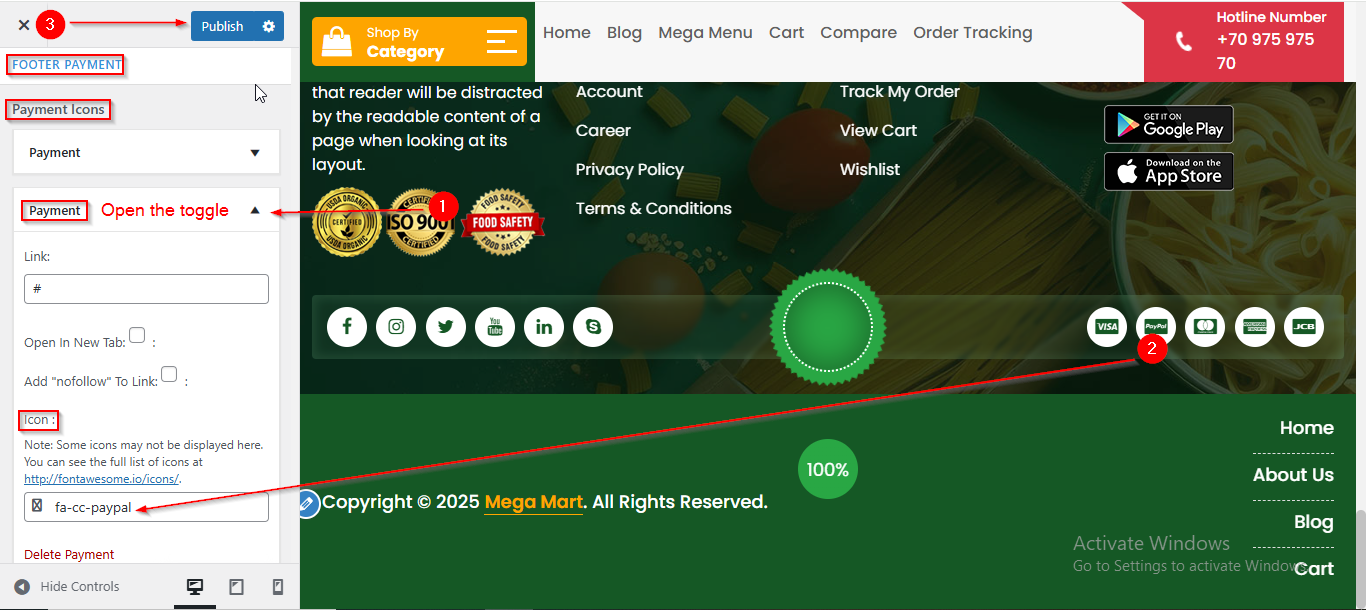
(8) How to manage the Payment Icons in Footer Section ?
Before proceeding, ensure you're logged into your WordPress Dashboard.
To manage the Payment Icons in Footer Section, follow these steps:
- From the WordPress Dashboard, navigate to Appearance > Customize.
- On the Customizer page, go to Footer > Below Footer.
- Scroll down until you see the FOOTER PAYMENT.
- Open the Payment toggle to manage the Payment Icons.
- Click Publish when you're done.
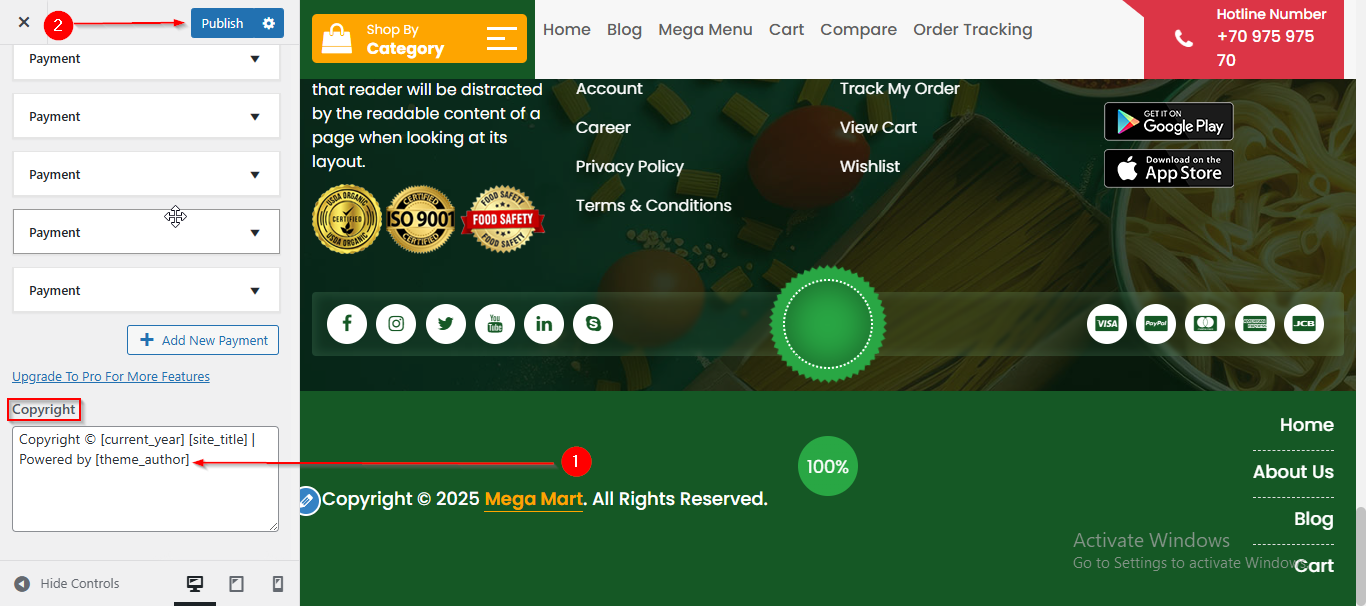
(9) How to manage the Copyright Text in Footer Section ?
Before proceeding, ensure you're logged into your WordPress Dashboard.
To manage the Copyright Text in Footer Section, follow these steps:
- From the WordPress Dashboard, navigate to Appearance > Customize.
- On the Customizer page, go to Footer > Below Footer.
- Scroll down until you see the Copyright text field.
- You can enter the Copyright text as per your preference.
- Click Publish when you're done.