

Pet Bazaar Pro Menu Setup
In this article, you’ll learn how to set up and customize the Menu of the Pet Bazaar Pro theme, This guide will help you configure these settings to align with your site’s branding and functionality needs.
(1) How to manage Menu from Dashboard ?
Before we move forward, it's important to note that menus can be added in two primary locations within our theme: the Header and the Footer. We will first explore how to manage the menu in the header, followed by instructions for the footer.
(a) How to Manage the Header Menu
Before proceeding, ensure you're logged into your WordPress Dashboard.
To manage the header menu, follow these steps:
- From the WordPress Dashboard, navigate to Appearance > Menus.
- On the Menus page, you will find various options for managing your menus. We will discuss these options in detail below.
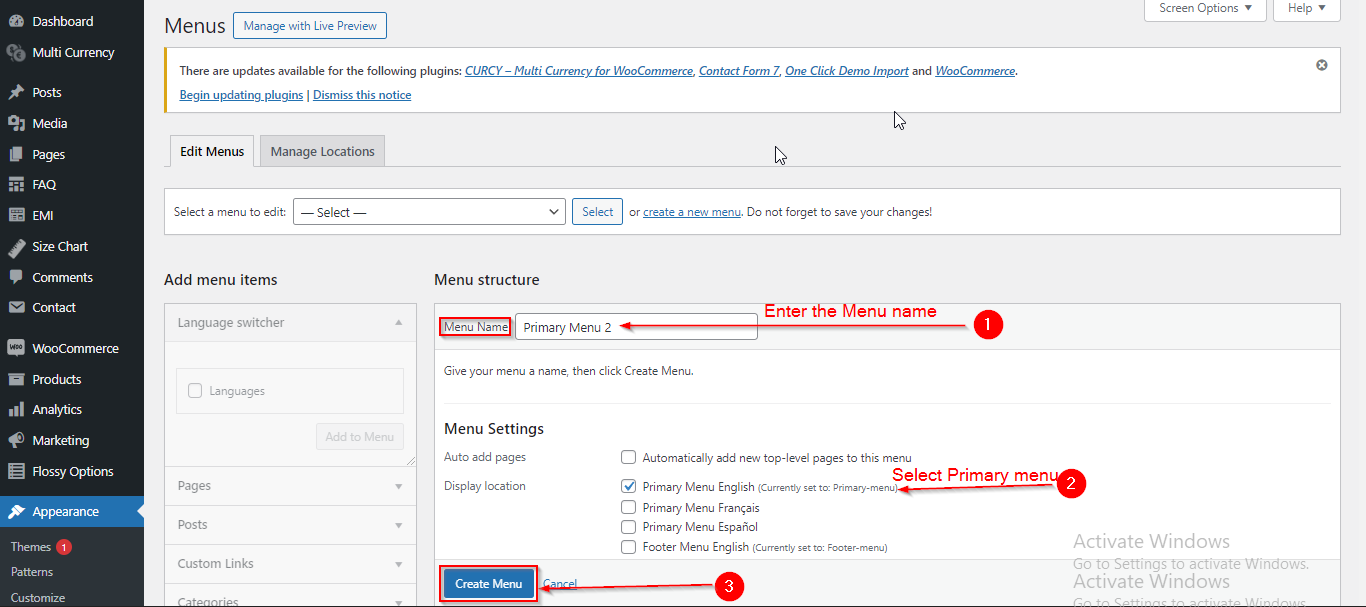
Setting Up Your Menu
To set up your menu, follow these steps:
- In the Menu Name field, enter a title of your choice for the menu.
- Select Primary Menu by checking the checkbox.
- Click Create Menu when you're done.
Note: Ensure you have checked the Primary Menu option. If you create your menu without enabling this checkbox, the menu will not appear in the header section.
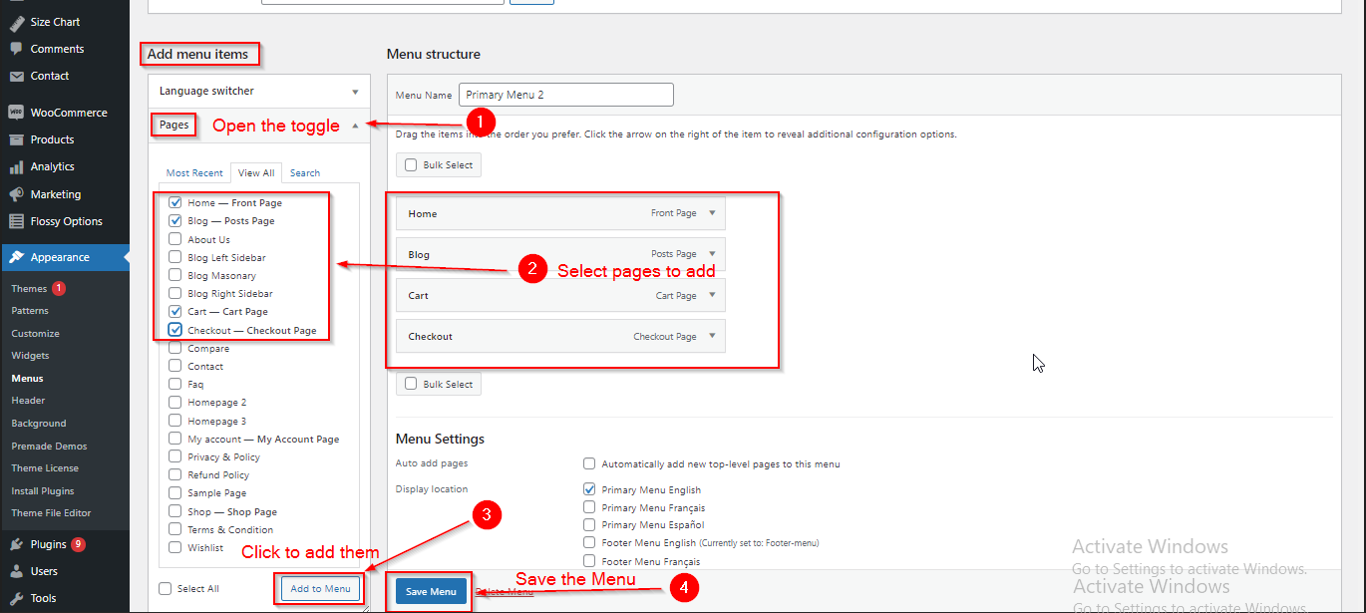
Adding Pages to Your Menu
To add pages to your menu, follow these steps:
- In the Add Menu Items section, open the Pages toggle.
- Select the pages you would like to add to your menu by checking the corresponding checkboxes.
- Once you have selected the pages, click on the Add to Menu button.
- After adding the pages, click on the Save Menu button to save your changes.
Creating Dropdown in your Menu
To create a dropdown in your menu, follow these steps:
- Select the pages that you wish to include as dropdown items.
- Position these pages directly beneath the parent page under which you want them to appear.
- Drag the selected pages slightly to the right; this will nest them under the parent page, creating the dropdown effect.
- Click Save Menu when you're done to apply your changes.
Tip: Ensure that the parent page is already added to the menu to effectively create a dropdown.

(b) How to Manage the Footer Menu
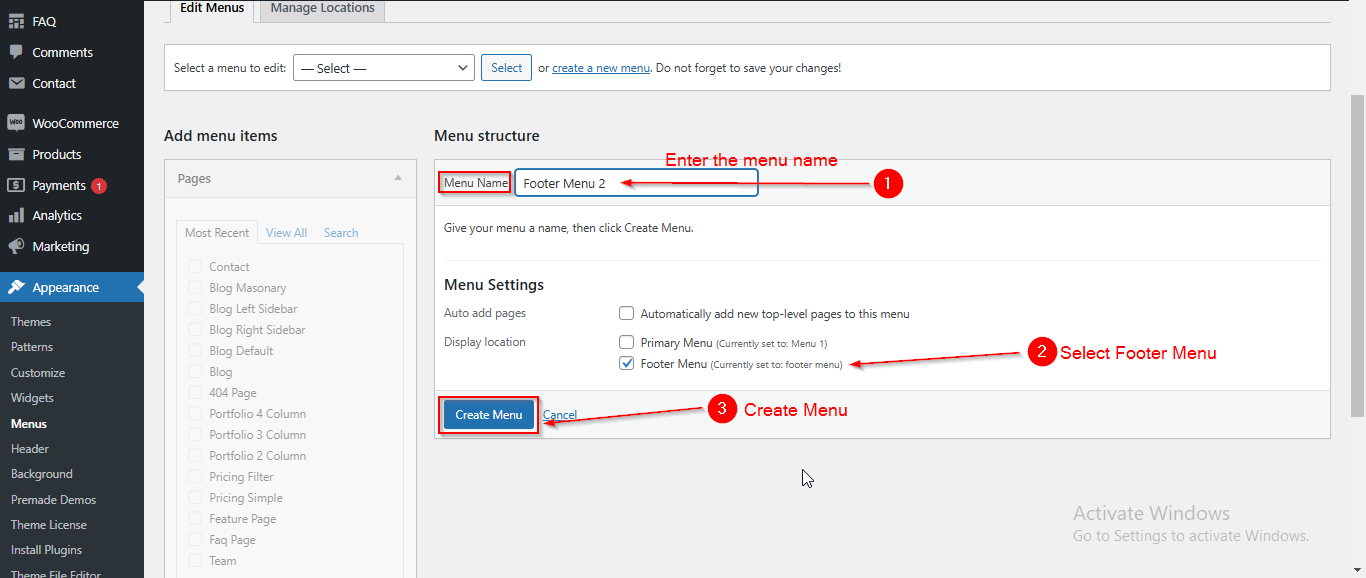
Setting Up Your Menu
Before proceeding, ensure you're logged into your WordPress Dashboard.
To manage the footer menu, follow these steps:
- From the WordPress Dashboard, navigate to Appearance > Menus.
- On the Menus page, in the Menu Structure section, enter a title of your choice in the Menu Name field.
- Check the Footer Menu option to select it.
- Click the Create Menu button when you're done.
Note: Ensure you have checked the Footer Menu option. If you create your menu without enabling this checkbox, the menu will not appear in the footer section.
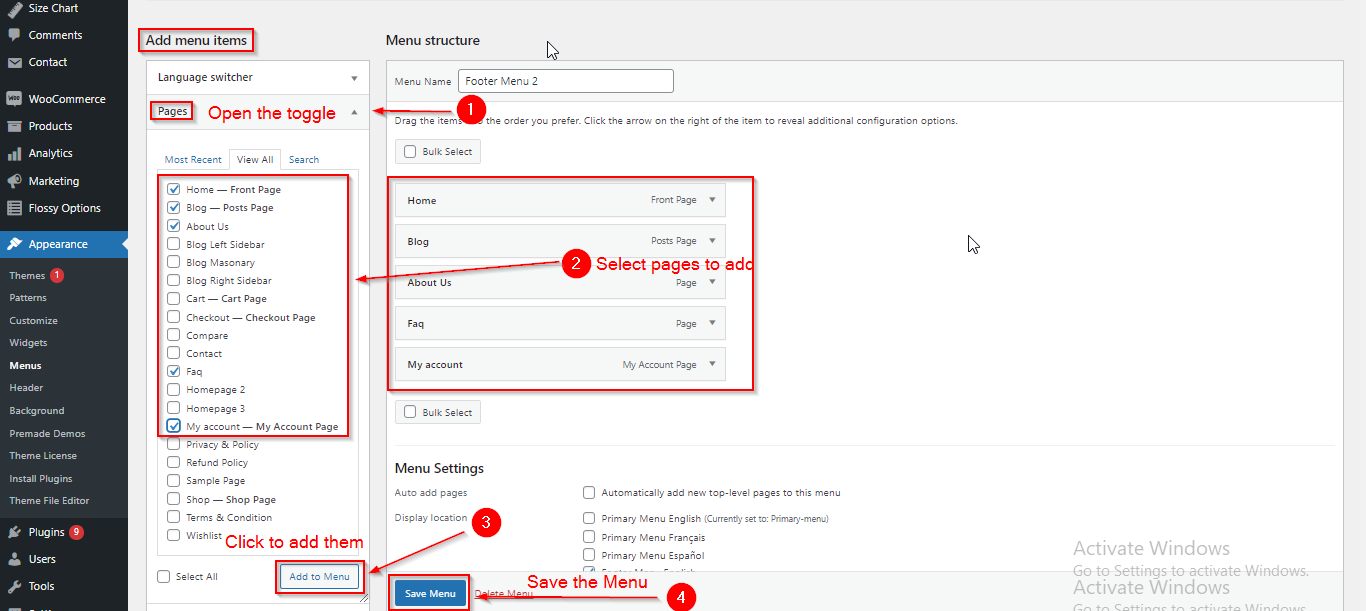
Adding Pages to Your Menu
To add pages to your menu, follow these steps:
- In the Add Menu Items section, open the Pages toggle.
- Select the pages you would like to add to your menu by checking the corresponding checkboxes.
- Once you have selected the pages, click on the Add to Menu button.
- After adding the pages, click on the Save Menu button to save your changes.
(2) How to manage Menu from Customizer ?
Just like in the Dashboard Menu, you can also create menus in the Customizer for both the Header and Footer. We will first learn about managing the Header menu and then the Footer.
(a) How to Manage the Header Menu
Setting Up Your Menu
Before proceeding, ensure you're logged into your WordPress Dashboard.
To manage the header menu, follow these steps:
- From the WordPress Dashboard, navigate to Appearance > Customizer.
- On the Customizer Page, go to Menus.
- Click on Create New Menu.
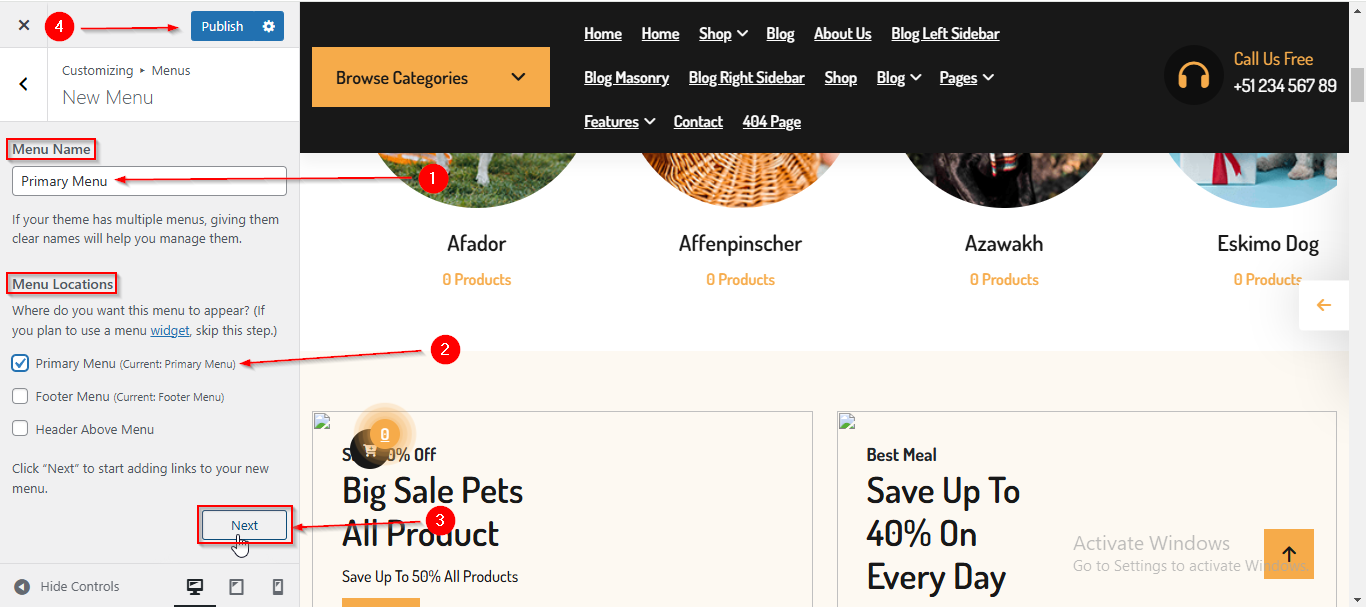
- Enter a name of your choice in the Menu Name field.
- Check the Primary Menu option to select it.
- Click the Next button when you're done.
Note: Ensure you have checked the Primary Menu option. If you create your menu without enabling this checkbox, the menu will not appear in the header section.
Adding Pages to Your Menu
To add pages to your menu, follow these steps:
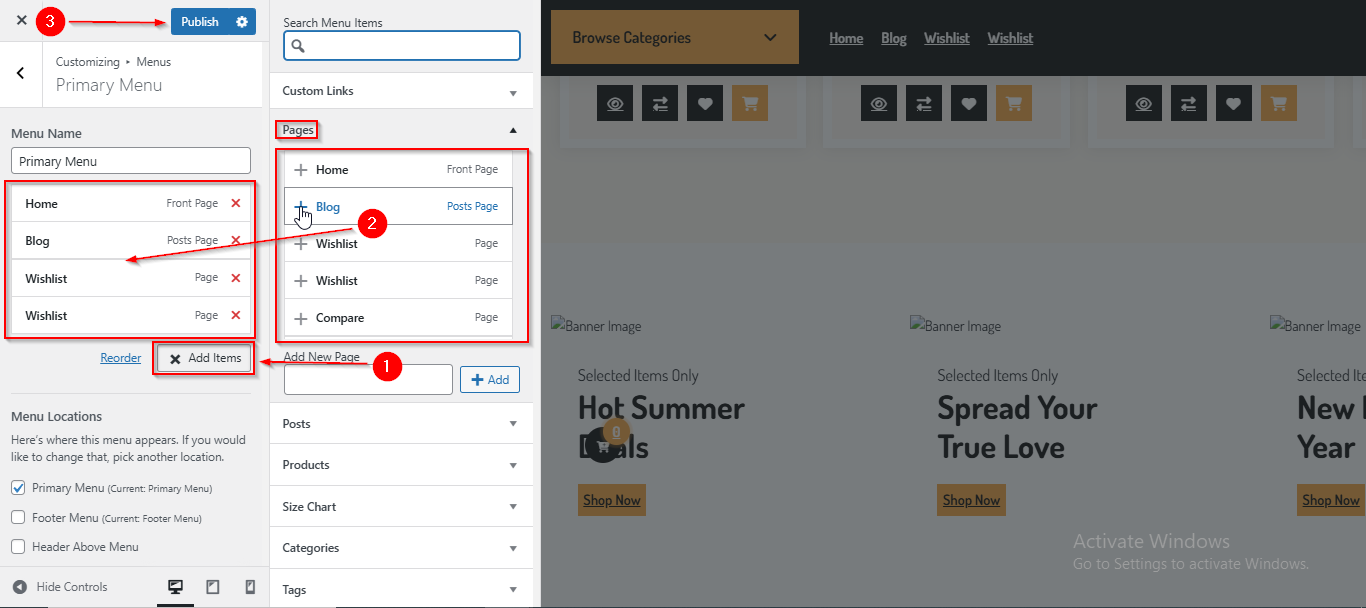
- After clicking the Next button, click on Add Items.
- A sidebar will appear, allowing you to select the pages you'd like to add from Pages.
- Click on the Plus (+) icon next to the pages you wish to include in your menu.
- Click Publish when you're done.
Creating Dropdown in your Menu
To create a dropdown in your menu, follow these steps:
- Select the pages that you wish to include as dropdown items.
- Position these pages directly beneath the parent page under which you want them to appear.
- Drag the selected pages slightly to the right; this will nest them under the parent page, creating the dropdown effect.
- Click Publish when you're done.
Tip: Ensure that the parent page is already added to the menu to effectively create a dropdown.
(b) How to Manage the Footer Menu
Setting Up Your Menu
Before proceeding, ensure you're logged into your WordPress Dashboard.
To manage the header menu, follow these steps:
- From the WordPress Dashboard, navigate to Appearance > Customizer.
- On the Customizer Page, go to Menus.
- Click on Create New Menu.
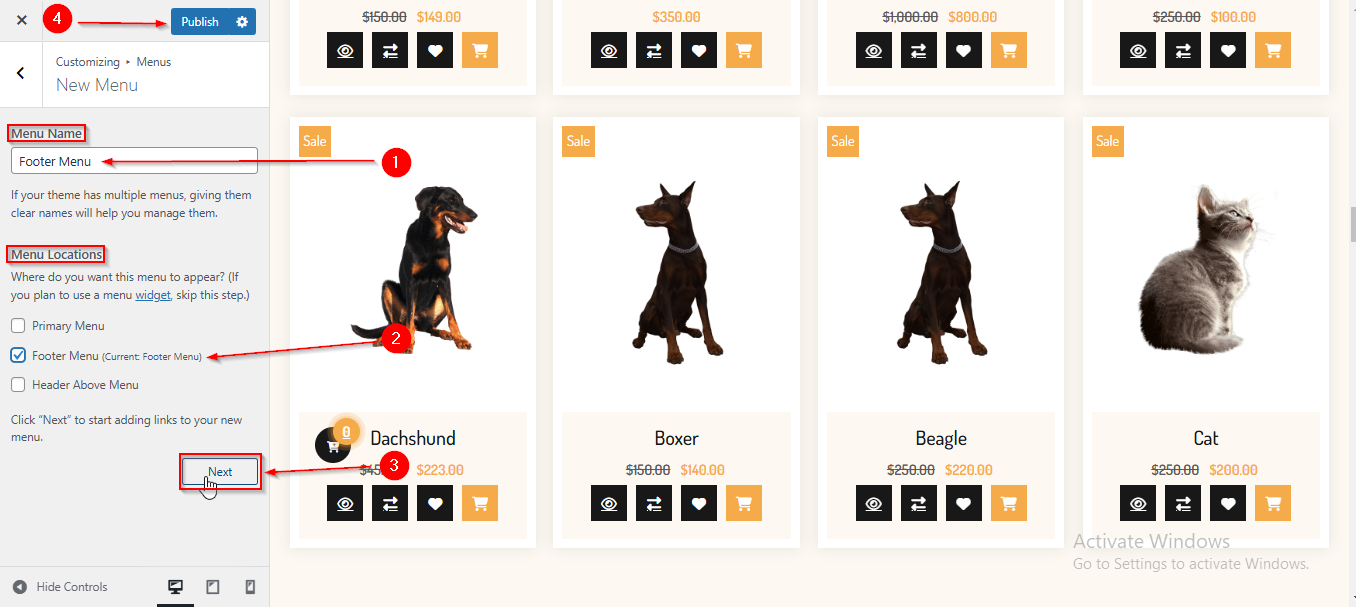
- Enter a name of your choice in the Menu Name field.
- Check the Footer Menu option to select it.
- Click the Next button when you're done.
Note: Ensure you have checked the Footer Menu option. If you create your menu without enabling this checkbox, the menu will not appear in the Footer section.
Adding Pages to Your Menu
To add pages to your menu, follow these steps:
- After clicking the Next button, click on Add Items.
- A sidebar will appear, allowing you to select the pages you'd like to add from Pages.
- Click on the Plus (+) icon next to the pages you wish to include in your menu.
- Click Publish when you're done.

(3) How to create Mega Menu in Dashboard ?
Mega Menu is one of the latest features we have started providing in our new themes. A Mega Menu is an advanced type of dropdown menu that gives you the flexibility to display multiple columns of links, images, or other content in a large panel. It helps organize complex navigation structures in a clean, user-friendly layout allowing you to add even more elements than a standard menu.
Now we will look at how to create the Mega Menu in our Theme.
Before proceeding, ensure you're logged into your WordPress Dashboard.
To create the Mega Menu, follow these steps:
- From the WordPress Dashboard, navigate to Appearance > Menu
- On the Menu page, go to the top-right corner and click the dropdown labeled Screen Options.
- Enable the CSS Classes checkbox under “Show advanced menu properties.”
- Next, add any type of Menu Item (e.g., Page, Custom Links, Posts, etc.) to the menu.
- Open the Menu Item toggle where you want to enable the Mega Menu.
- In the CSS Classes (optional) field, enter the class name: has-mega-menu .
- Click Save Menu.
- Now, go to Appearance > Widgets.
- On the Widgets page, you’ll notice a new Widget Area has been created on the bottom-right side of the page. Its name will be a combination of the Menu Item name + Mega Menu.
- This newly created Widget Area is your Mega Menu. You can now add your own widgets here to build and customize the Mega Menu content.
Note : Before following the steps mentioned above, please ensure that you have assigned the Primary Menu to your theme. The Mega Menu functionality is available only within the Header section, and it will not work unless the menu you're editing is set as the Primary Menu. If a different menu is selected or left unassigned, the Mega Menu feature and its associated widget area will not appear or function as expected

Please note that this article only covers the essential aspects of managing menus of our theme. For a more detailed guide on WordPress menus, please refer to this article: https://codex.wordpress.org/WordPress_Menu_User_Guide.