Flossy Lite WooCommerce Setup
In this article, you’ll learn how to set up and customize the WooCommerce of the Flossy Lite theme, This guide will help you configure these settings to align with your site’s branding and functionality needs.
Reminder: Ensure the WooCommerce plugin is activated. Without it, the WooCommerce option won’t appear, and you won’t be able to access the related settings.
(1) How to manage the Store Notice in WooCommerce ?
Before proceeding, ensure you're logged into your WordPress Dashboard.
To manage the Store Notice in WooCommerce, follow these steps:
- From the WordPress Dashboard, navigate to Appearance > Customize.
- On the Customizer page, go to WooCommerce > Store Notice.
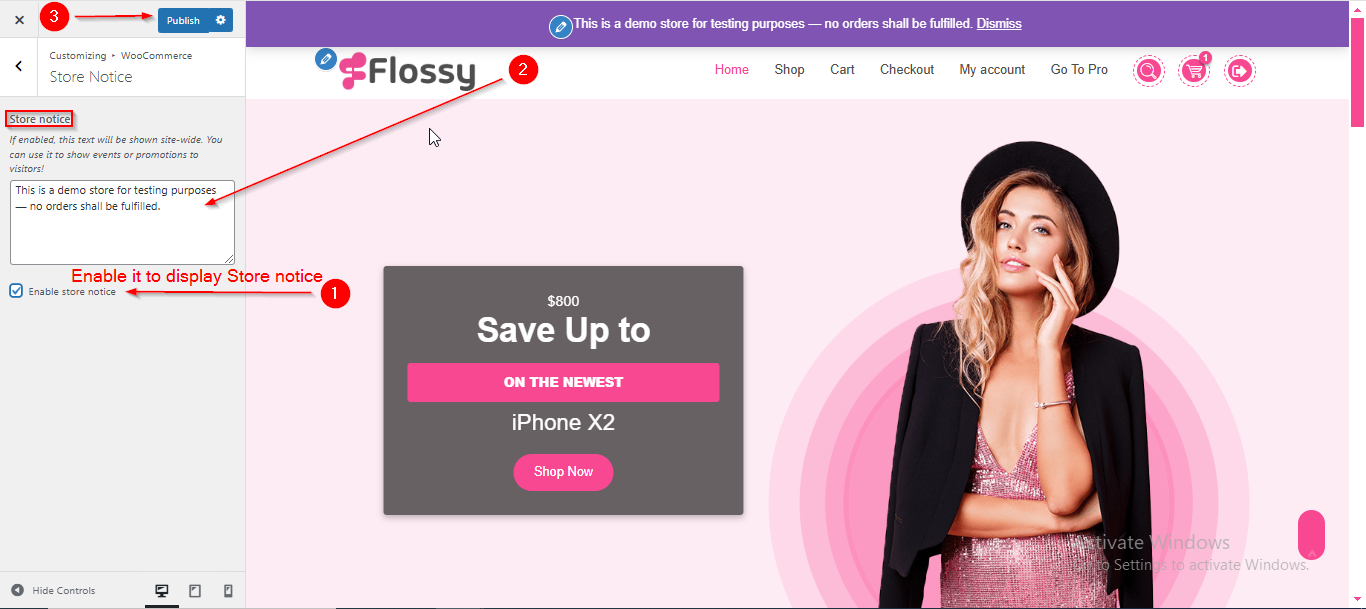
- Here, you can manage the Store Notice.
- Click Publish when you're done.
Note: Ensure the checkbox labeled Enable store notice is checked if you want to display the Store Notice.

(2) How to manage the Product Catalog in WooCommerce ?
Before proceeding, ensure you're logged into your WordPress Dashboard.
To manage the Product Catalog in WooCommerce, follow these steps:
- From the WordPress Dashboard, navigate to Appearance > Customize.
- On the Customizer page, go to WooCommerce > Product Catalog.
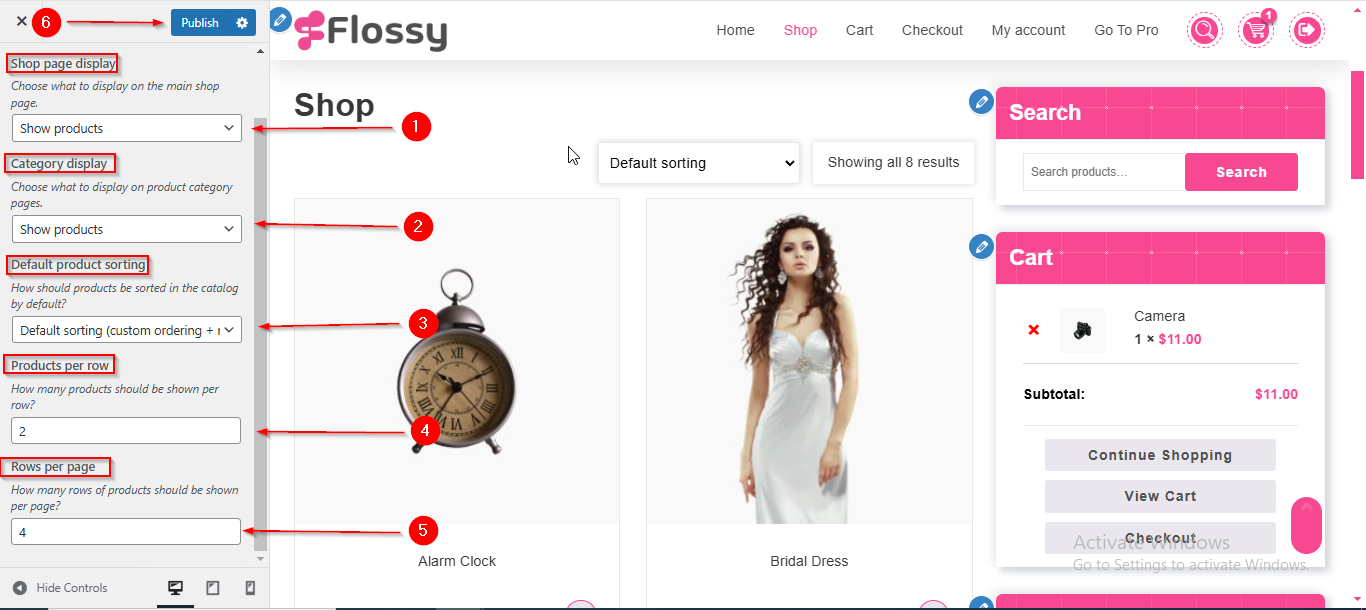
- Here, you can manage various Product settings such as what you want to display on the Shop page, what to show on the Product Category page, how you want products to be sorted, products per row, and rows per page.
- Click Publish when you're done.

(3) How to Manage the Product Images in WooCommerce ?
Before proceeding, ensure you're logged into your WordPress Dashboard.
To manage the Product Images in WooCommerce, follow these steps:
- From the WordPress Dashboard, navigate to Appearance > Customize.
- On the Customizer page, go to WooCommerce > Product Images.
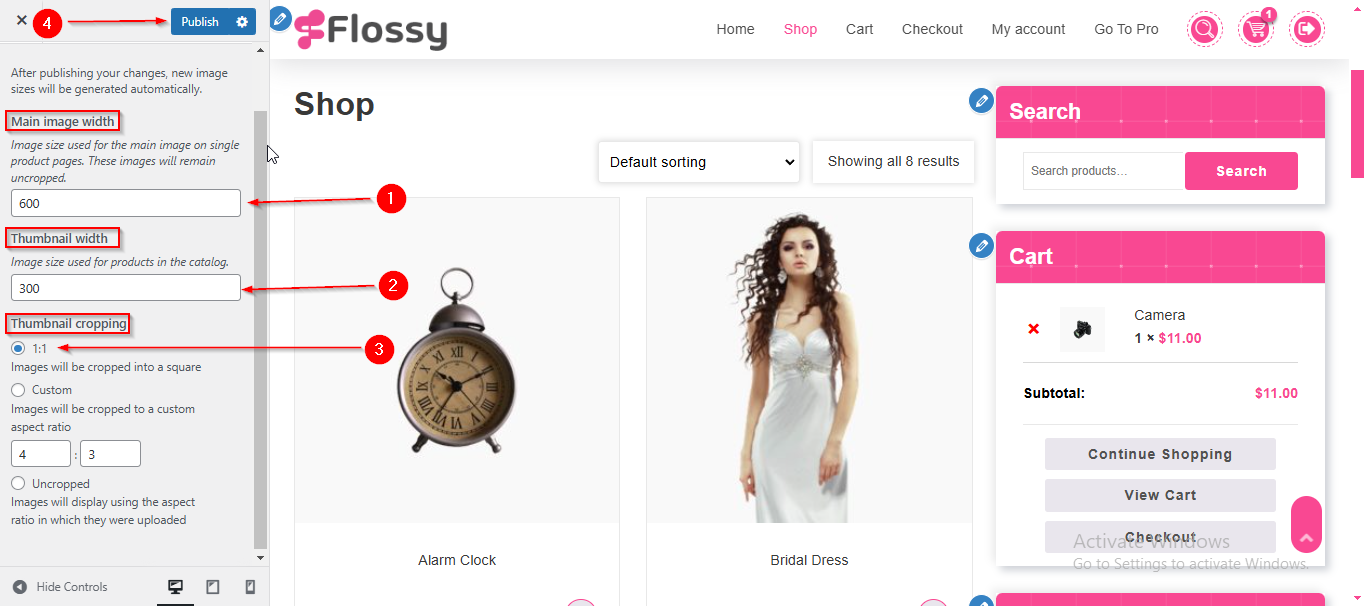
- Here, you can manage various Product Images settings such as main image width, thumbnail width, and thumbnail cropping.
- Click Publish when you're done.

(4) How to Manage the Checkout in WooCommerce?
Before proceeding, ensure you're logged into your WordPress Dashboard.
To manage the Checkout in WooCommerce, follow these steps:
- From the WordPress Dashboard, navigate to Appearance > Customize.
- On the Customizer page, go to WooCommerce > Checkout.
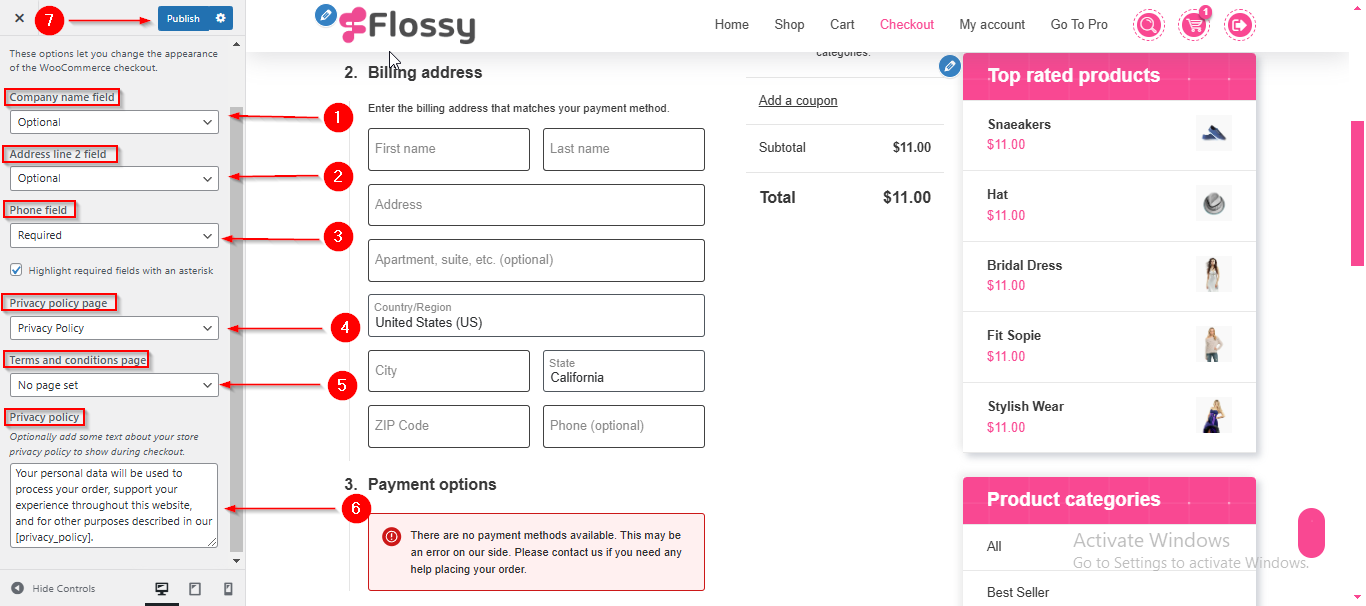
- Here, you can manage various Checkout settings such as field names, privacy policy page, terms & conditions page, and privacy policy.
- Click Publish when you're done.


