Flossy Pro General Setup
In this article, you’ll learn how to set up and customize the general components of the Flossy Pro theme, such as the Preloader, Containers, Sidebar, Top Scroller, Page Breadcrumb & Newsletter . This guide will help you configure these settings to align with your site’s branding and functionality needs.
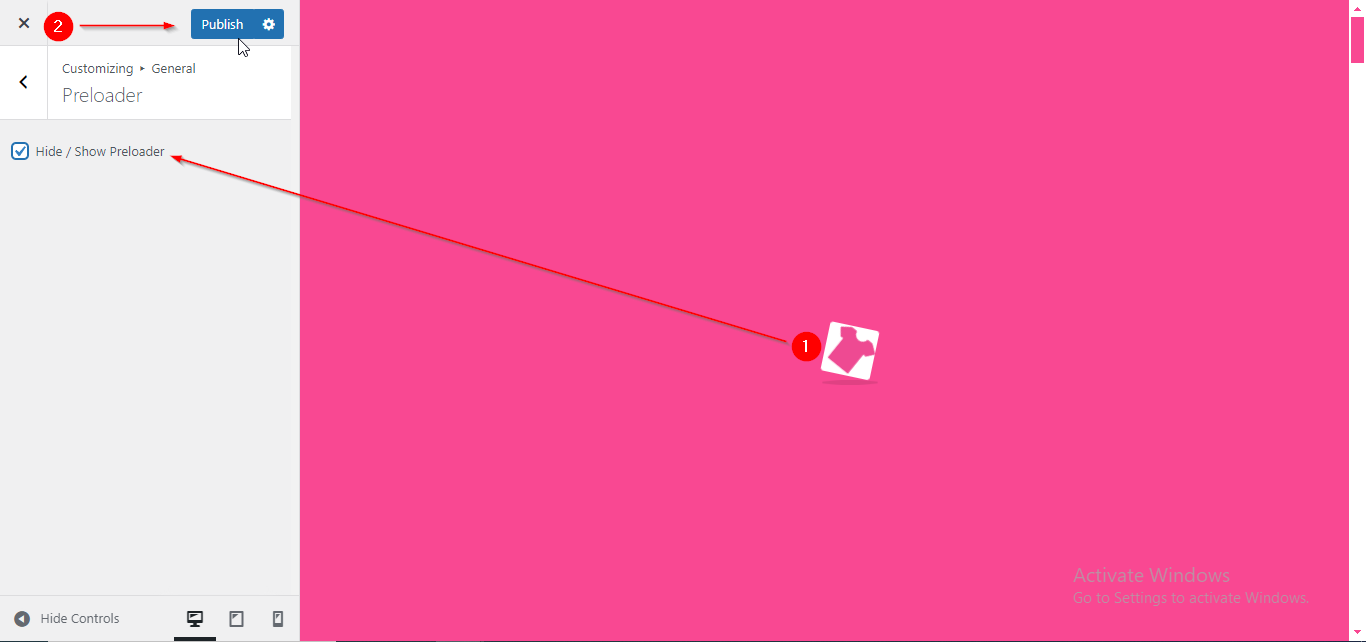
(1) How to manage the Preloader in General ?
Before proceeding, ensure you're logged into your WordPress Dashboard.
To manage the Pre Loader in the General, follow these steps:
- From the WordPress Dashboard, navigate to Appearance > Customize.
- On the Customizer page, go to General > Preloader.
- Here, you can manage the Preloader by enabling or disabling the Hide/Show checkbox.
- Click Publish when you’re done.
(2) How to manage the Container Width in General ?
Before proceeding, ensure you're logged into your WordPress Dashboard.
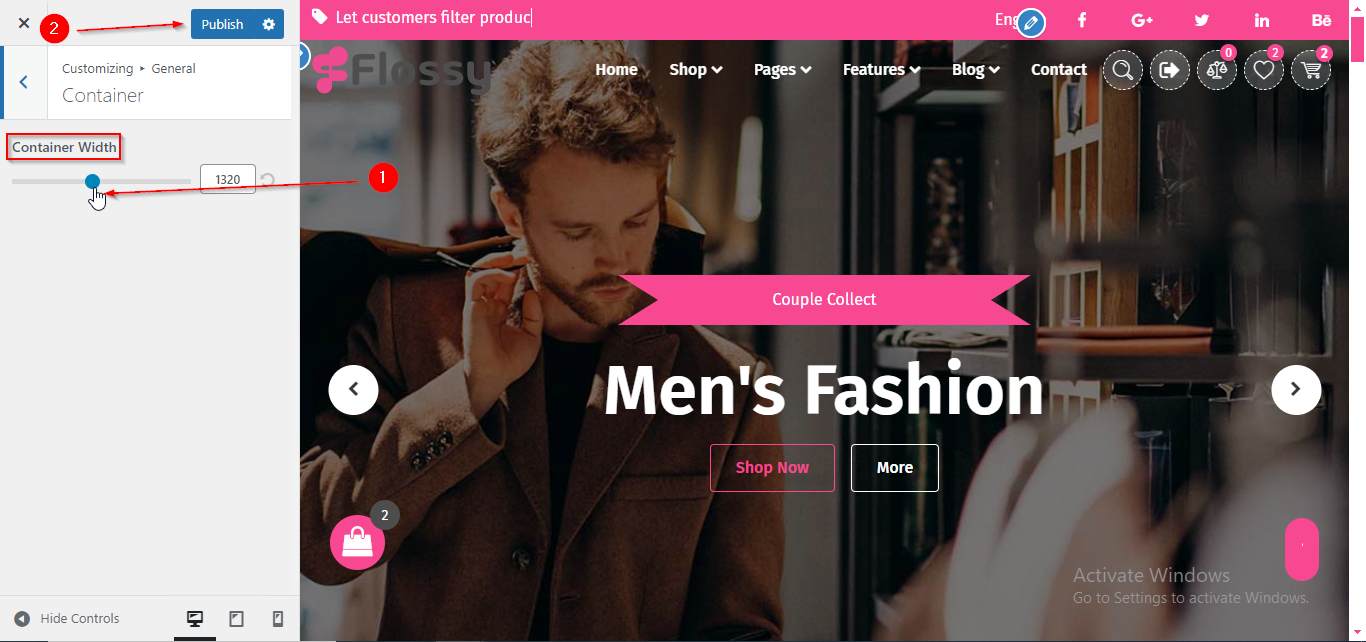
To manage the Container in the General, follow these steps:
- From the WordPress Dashboard, navigate to Appearance > Customize.
- On the Customizer page, go to General > Container.
- Here, you can adjust the Container Width by using the slider.
- Click Publish when you’re done.
(3) How to manage the Sidebar Layout for different pages in General ?
Before proceeding, ensure you're logged into your WordPress Dashboard.
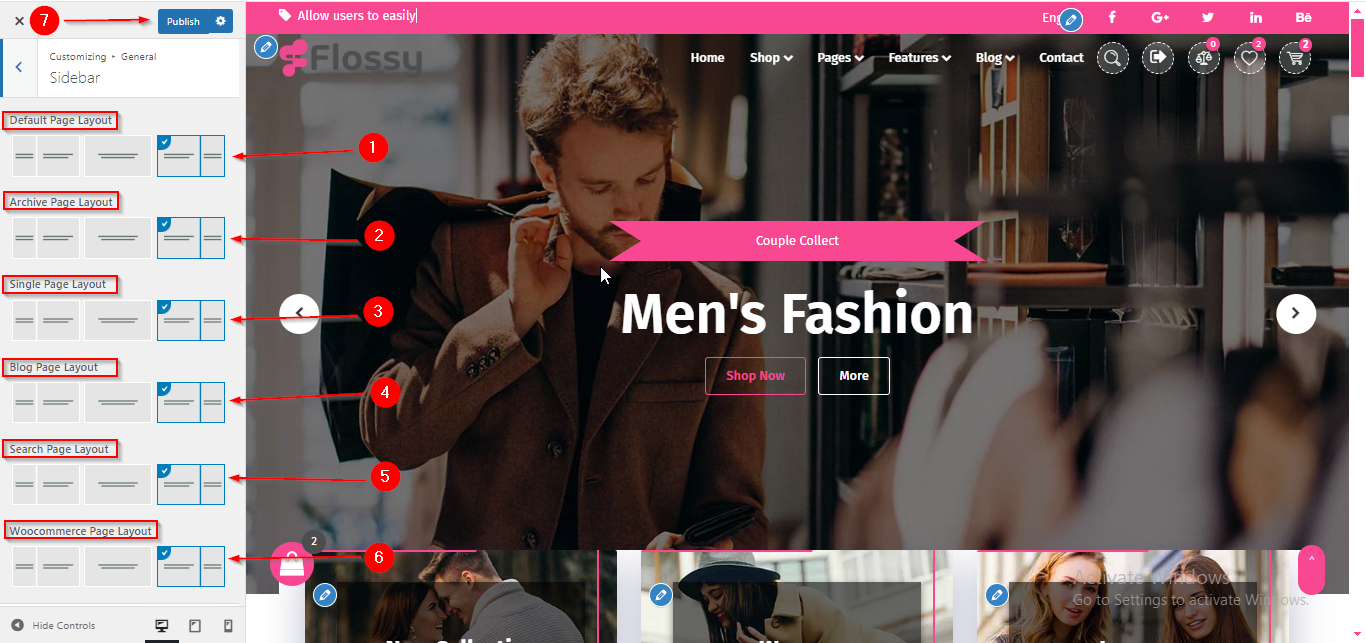
To manage the Sidebar Layout for different pages in General, follow these steps:
- From the WordPress Dashboard, navigate to Appearance > Customize.
- On the Customizer page, go to General > Sidebar.
- Here, you can manage Sidebar Layouts for different pages such as Default Page, Archive Page, Single Page, etc .
- Click Publish when you’re done.
(4) How to manage the Sidebar Width and Widget Title Font Size in General ?
Before proceeding, ensure you're logged into your WordPress Dashboard.
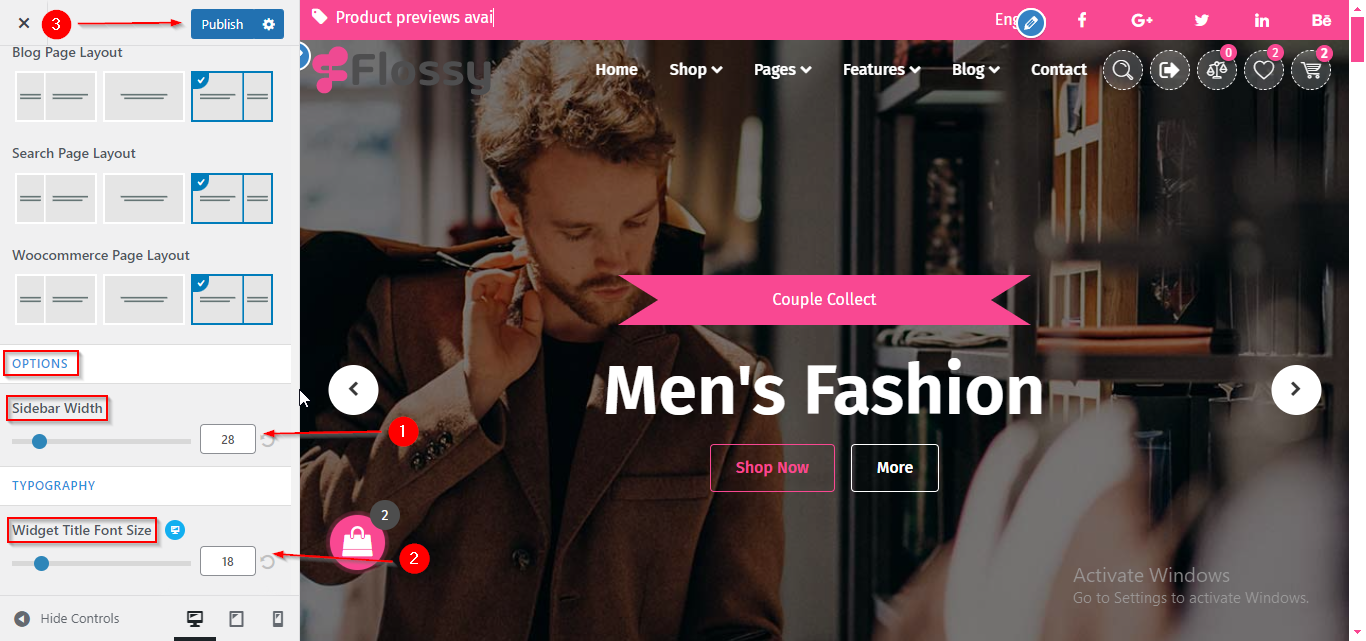
To manage the Sidebar Width and Widget Title Font Size in General, follow these steps:
- From the WordPress Dashboard, navigate to Appearance > Customize.
- On the Customizer page, go to General > Sidebar.
- Here, you have to scroll down till OPTIONS section , from where you can manage the Sidebar Width and Widget Title Font Size.
- Click Publish when you’re done.
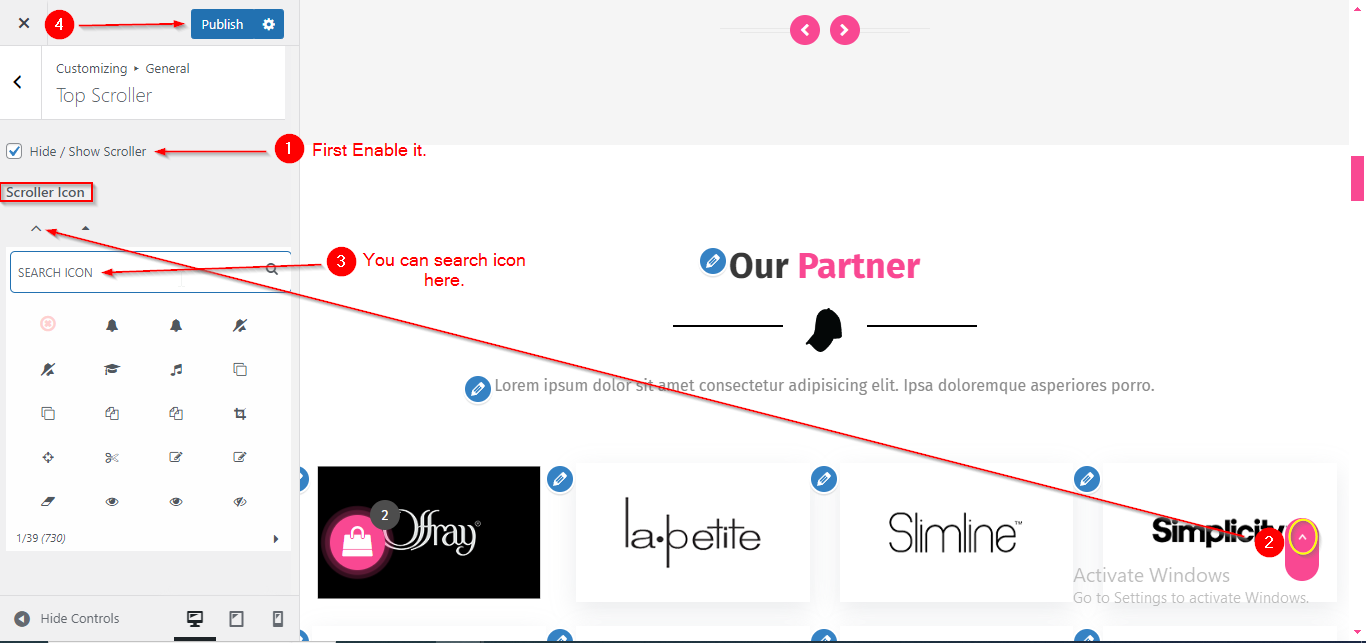
(5) How to manage the Top Scoller in General ?
Before proceeding, ensure you're logged into your WordPress Dashboard.
To manage the Top Scoller in General, follow these steps:
- From the WordPress Dashboard, navigate to Appearance > Customize.
- On the Customizer page, go to General > Top Scroller.
- Here, you can manage the Top Scroller by selecting your desired icon from the dropdown below Scroller Icon.
- Click Publish when you’re done.
Note : Ensure the checkbox labeled Hide/Show is checked if you want to display the Top Scoller.
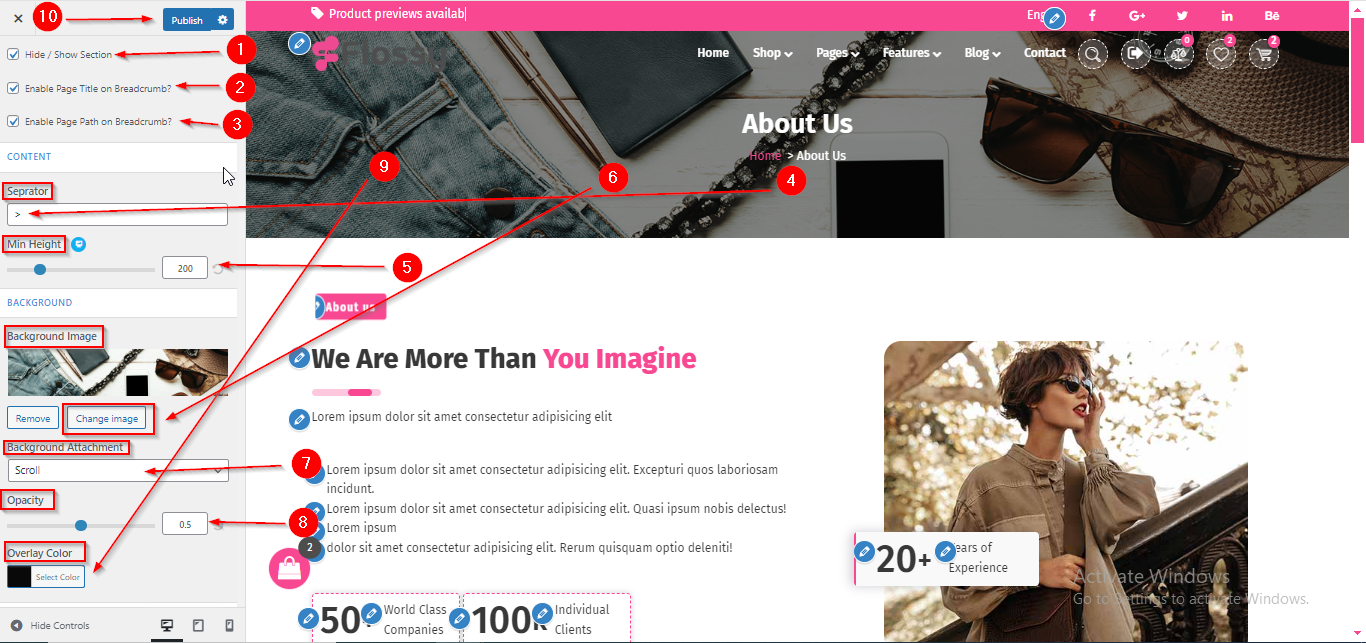
(6) How to manage the Page Breadcrumb in General ?
Before proceeding, ensure you're logged into your WordPress Dashboard.
To manage the Page Breadcrumb in General, follow these steps:
- From the WordPress Dashboard, navigate to Appearance > Customize.
- On the Customizer page, go to General > Page Breadcrumb.
- Here, you can manage all the related settings for the Breadcrumb Section.
- Click Publish when you’re done.
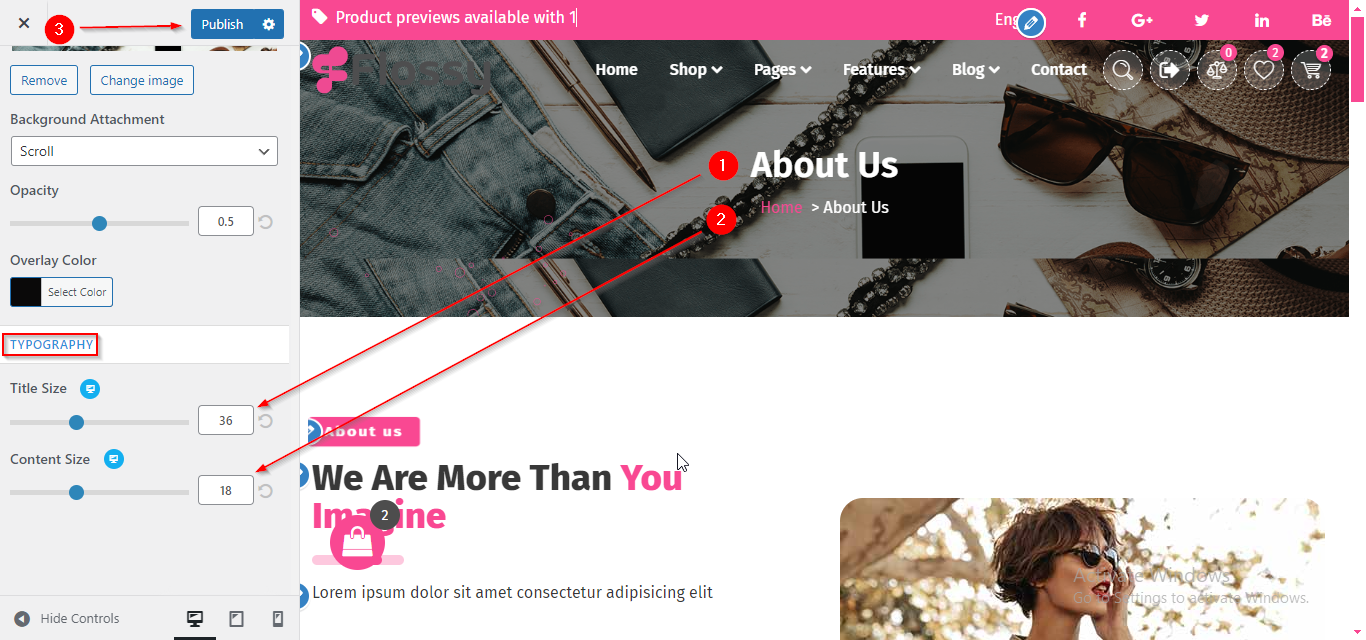
(7) How to manage the Page Breadcrumb Typography in General ?
Before proceeding, ensure you're logged into your WordPress Dashboard.
To manage the Page Breadcrumb Typography in General, follow these steps:
- From the WordPress Dashboard, navigate to Appearance > Customize.
- On the Customizer page, go to General > Page Breadcrumb.
- Here, scroll down till TYPOGRAPHY section, where you can adjust the Page Breadcrumb Typography settings.
- Click Publish when you’re done.
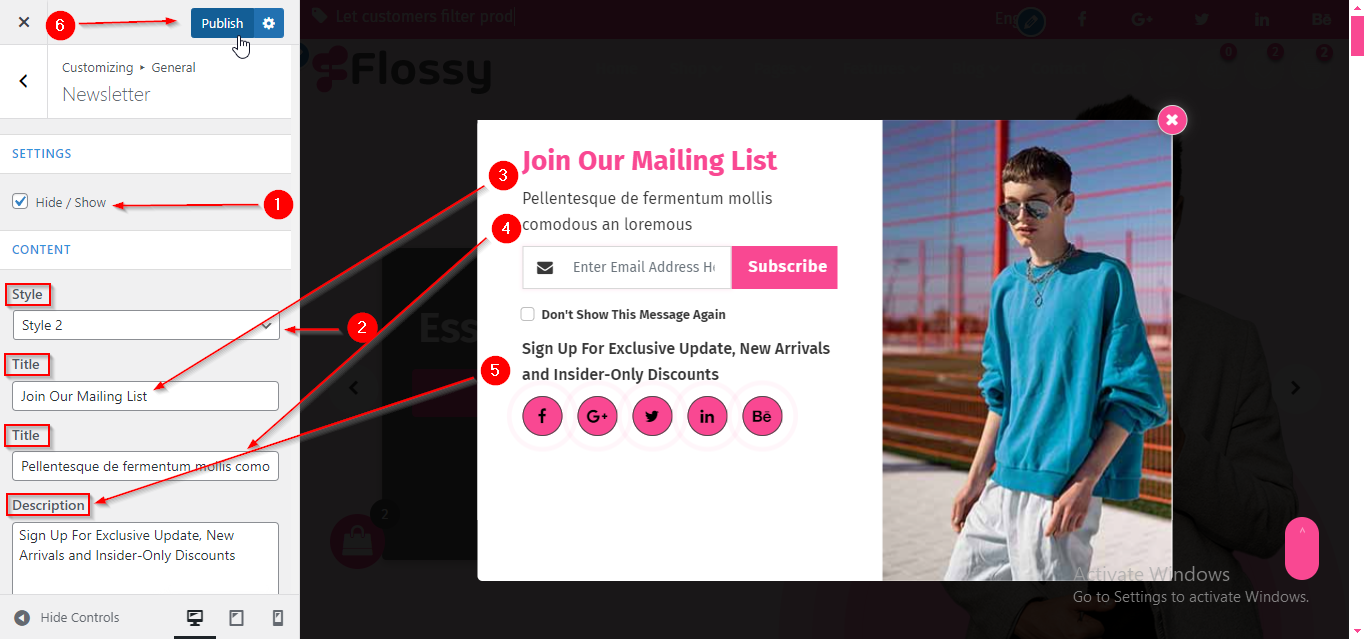
(8) How to manage the Newsletter Style, Title & Description in General ?
Before proceeding, ensure you're logged into your WordPress Dashboard.
To manage the Newsletter Style , Title & Description in General, follow these steps:
- From the WordPress Dashboard, navigate to Appearance > Customize.
- On the Customizer page, go to General > Newsletter.
- Here, you can manage the Newsletter Style , Title & Description.
- Click Publish when you’re done.
Note : Ensure the checkbox labeled Hide/Show is checked if you want to display the Newsletter.
Important: The Newsletter section will only be visible if the selected template is Homepage 1. It will not be displayed with any other template, so make sure you have selected the Homepage 1 template to make the Newsletter section visible.
(9) How to manage Newsletter Image & Social Icons in General ?
Before proceeding, ensure you're logged into your WordPress Dashboard.
To manage the Newsletter image & Social icons in General, follow these steps:
- From the WordPress Dashboard, navigate to Appearance > Customize.
- On the Customizer page, go to General > Newsletter.
- Here, you can manage the Newsletter image & Social icons.
- Click Publish when you’re done.


